Breakdown 3 of 4
Gameplay systems
I built gameplay systems for Project UMBRAE, including events, cutscenes, openables, interactables and lights.
Overview
Most of my tech art time on Project UMBRAE went on the gameplay and technical systems other people’s work was built on, while Joel and Kanye covered most of the general gameplay, like puzzles and inventory, between them. I prioritised fundamental systems because getting one in early makes adding content easier for everyone afterwards, although some had to wait longer than I would have liked.
Event system
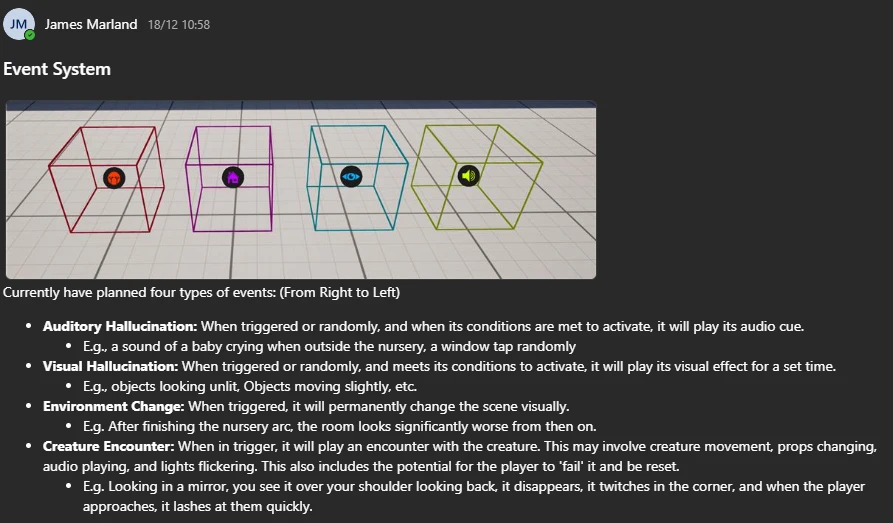
The event system is behind almost every scare, audio cue and puzzle trigger in the house. I started it in pre-production by setting up the parent and child categories as blueprints and outlining them to the team.
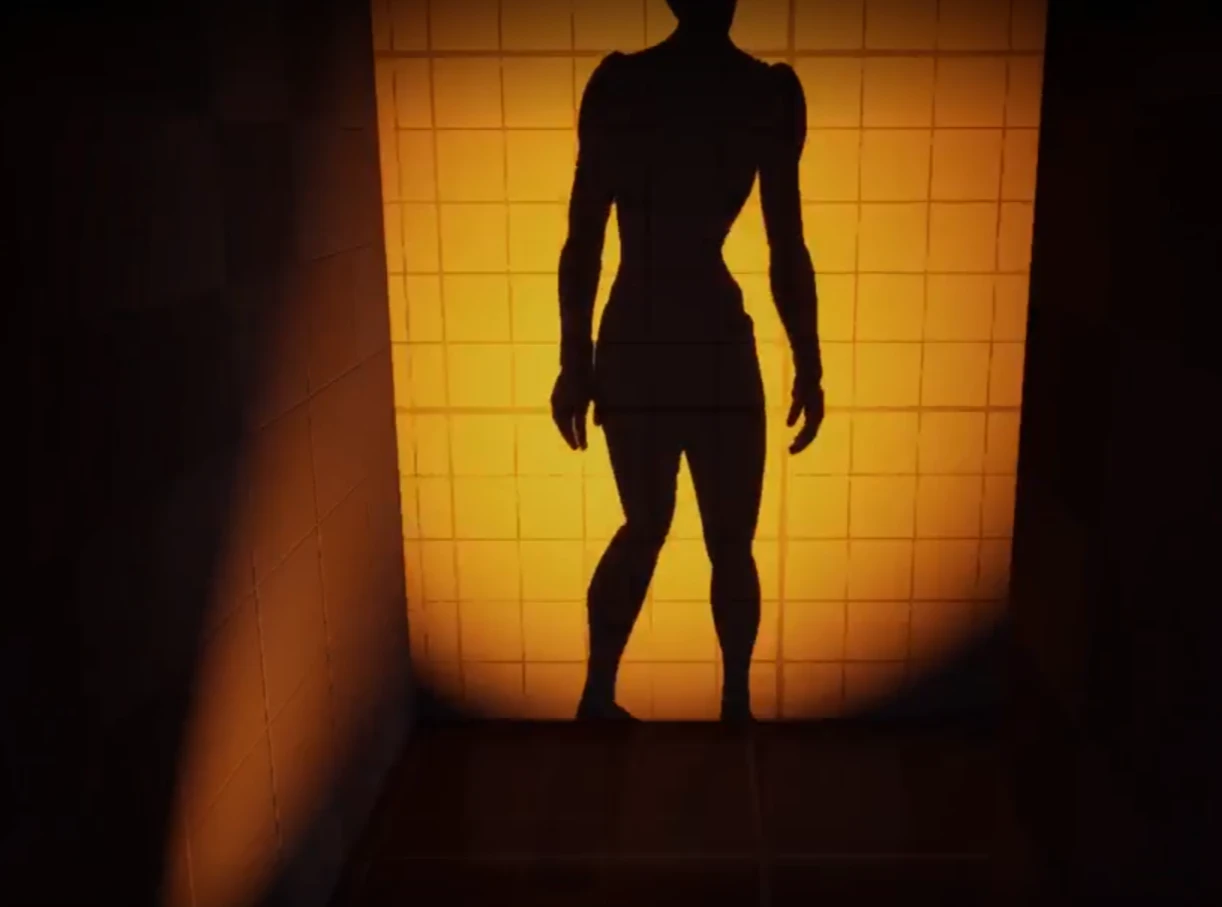
The first event was a test scare, made once Lauren had given me the creature’s idle animation, in which the creature flickers in and out of view and keeps casting a shadow while it’s invisible. I then walked Lauren through the designer-facing side so they could build their own scares, and by the end our animators, none of whom had used Unreal before, were setting up events themselves.
Look At
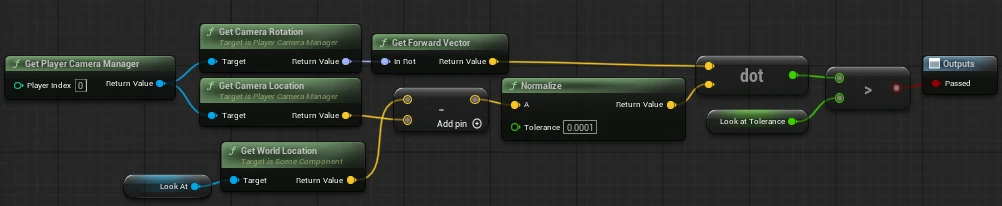
In playtests, players would walk into a scare’s trigger without looking at it and miss the scare completely, so I added a Look At condition. It takes the dot product of the camera’s forward vector and the direction from the camera to a set point, and compares it against a tolerance that has to hold for a set time before the condition passes (Epic Developer Community, n.d.).
Rebuilding around conditions
The original event system worked, but it wasn’t suited to every situation. Events had no real awareness of the game state, the shared parent wasn’t being used to give general-purpose controls, and only the creature encounter was fleshed out. Later in production I rebuilt it around a flexible conditions system, with a shared parent that handles the event states and every condition an event can use. Each child only defines what happens when it plays, and the final 4 are:
- Auditory Hallucination - Sets its audio component to the sound picked on the event and plays it all the way through, using a shared attenuation for every audio event. When the sound finishes, the event stops itself. Auditory events are the only type set to Controlled by manager by default, so most of them play at random through the Event Manager when they are primed.
- Visual Hallucination - Creates a player for its level sequence and plays it once, leaving the player in control. When the sequence stops, so does the event.
- Creature Encounter - Creates its sequence player as soon as the event is primed, so the creature is already in place before the player arrives. Frame gate keys in the sequence mark each stage and either pause the sequence or reverse it to loop that stage, and when the event activates the sequence carries on to the next stage, so the creature reacts to what the player does.
- Cutscene - Sends its cutscene, level sequence and whether the flashlight stays visible to the cutscene manager in the game mode, which handles the rest.
Every event inherits the same 10 conditions from the parent, covering the player, their inventory and the world. Each condition stays off until it’s switched on, and the yes or no checks take Ignore, True or False, so anything left on Ignore never holds an event back. One function on the parent runs through every condition in turn and fails the event as soon as one check fails. Each event has 2 sets of these conditions: primed conditions move it from setup to primed, and active conditions make it play. An event set to Controlled by manager also needs the Event Manager’s permission before its active conditions count, and once it has played it stops, or goes back to setup if Reset after done is on.
The event parent’s parameters
State
Player conditions
- Location
- Distance
- Look at
- Room
Inventory conditions
- Flashlight
- Has tile
- Has key
World conditions
- Timer
- Interactables
- More
- float
- bool
- array
- enum
I also added event system actions to the Level Sequencer, letting a sequence change the player’s speed, close doors, trigger lightning and turn the lights off. The conditions overhaul came late in development, so I had to remake every existing event to use them.
Event Manager
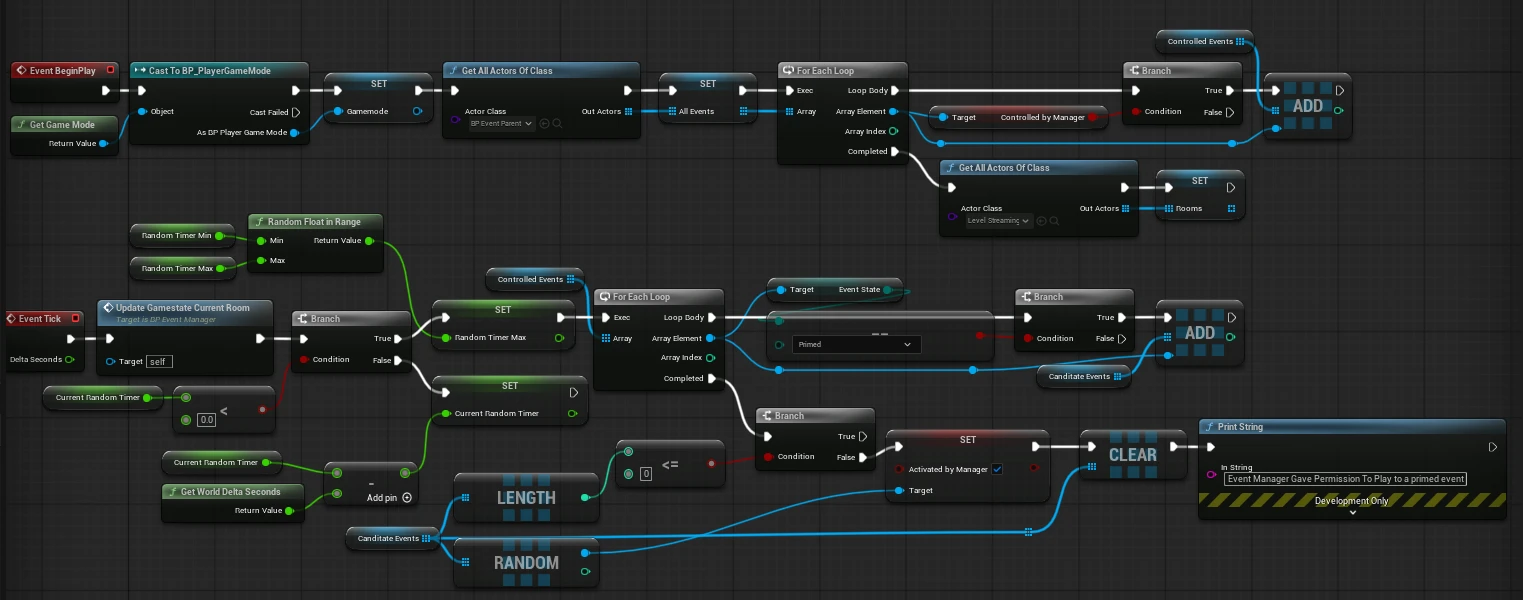
The Event Manager sits in the global gameplay level and runs the random audio around the house. On begin play it collects every event set to Controlled by manager, which auditory events are by default. Every tick it checks which room’s level streaming volume the player is inside, writes that room to the game state for the Room condition, and counts down a timer set to a random time between a minimum and maximum. When the timer runs out, it gathers every controlled event that is currently primed, picks one at random and gives it permission to play. That event still has to pass its own active conditions, so a sound only plays when it fits where the player is and what they’ve done, and the same sounds don’t play in the same order on every playthrough.
Cutscenes
Shanti and Lauren animated all of the cutscenes. I did the technical side of every one, from the triggers that start them to attaching items for the characters to hold, and event triggers for other blueprints to fire from. I had the foresight for the cutscene manager to handle shared logic generically, like player movement, HUD visibility and firing triggers for whatever should happen afterwards. Every cutscene has an entry in one list (Menu, Start, Breaker, Kitchen, Nursery, Bathroom, Furnace, Clock and the Ending), and a cutscene event only has to pass in its entry, its level sequence and whether the flashlight stays visible. The manager puts the player into cinematic mode, plays the sequence with the HUD hidden and movement disabled, and binds to the sequence ending. When it ends, it moves the player to the sequence’s final position, gives control back and runs whatever that cutscene needs afterwards.
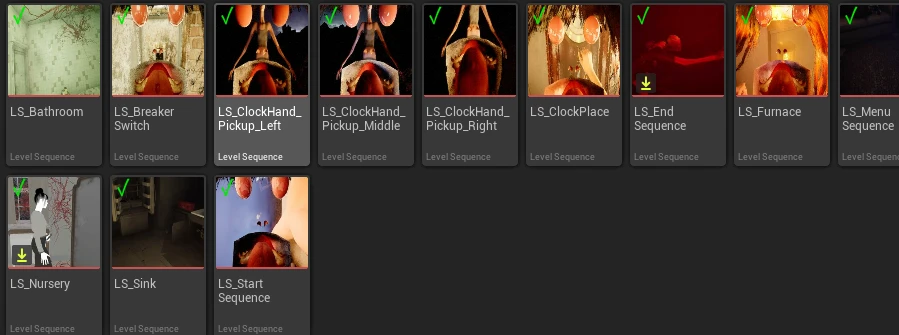
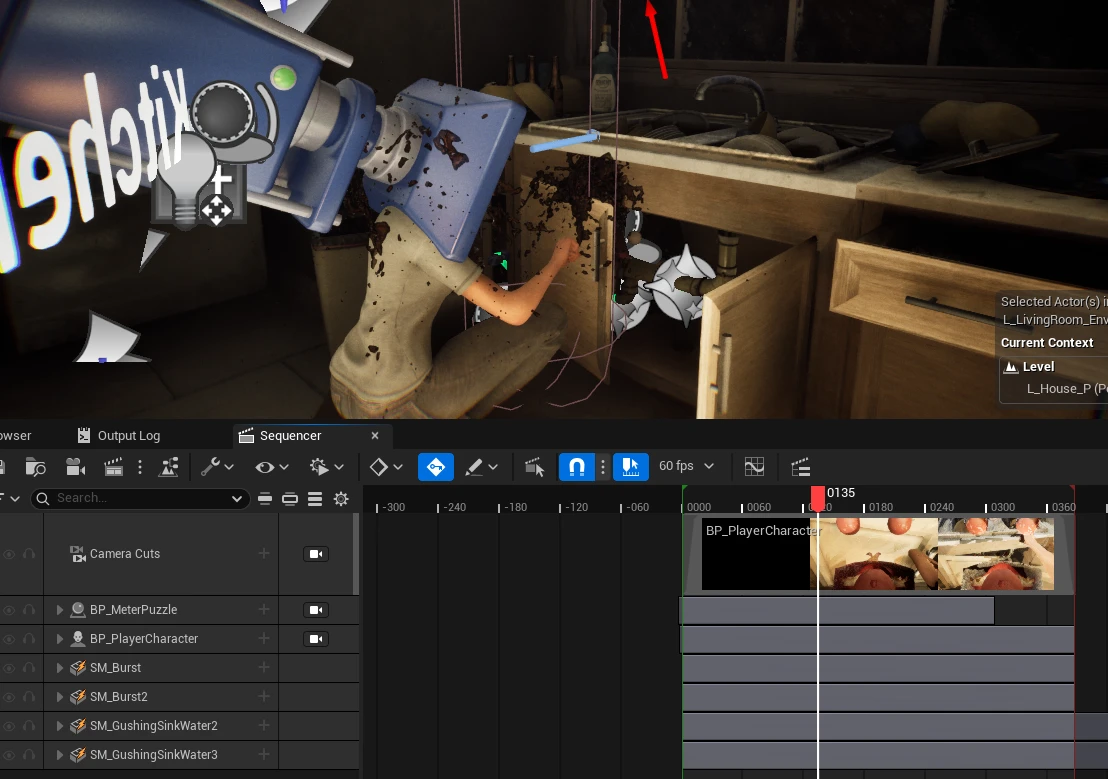
Later I extended it so the player lerps into position before a sequence instead of snapping, and anything they’ve interacted with keeps its state, so doors, lights and items don’t reset after a sequence plays.
Vertex animation textures
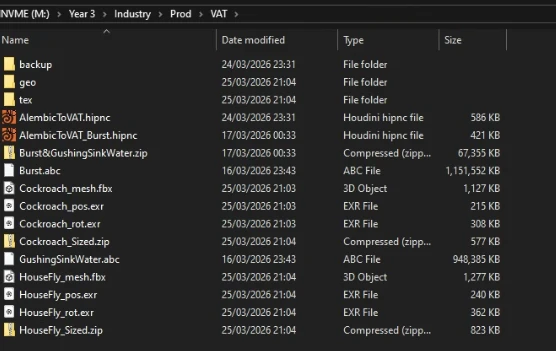
Matty made Alembic simulations for the sink burst and the gushing water, along with the cockroach and fly animations. I converted them into VATs in Houdini so they were much cheaper to play back, following SideFX’s tutorial for the setup (SideFX, n.d.). Each export is a mesh with position and rotation textures that a material plays back on the GPU.
Interactables
Lights
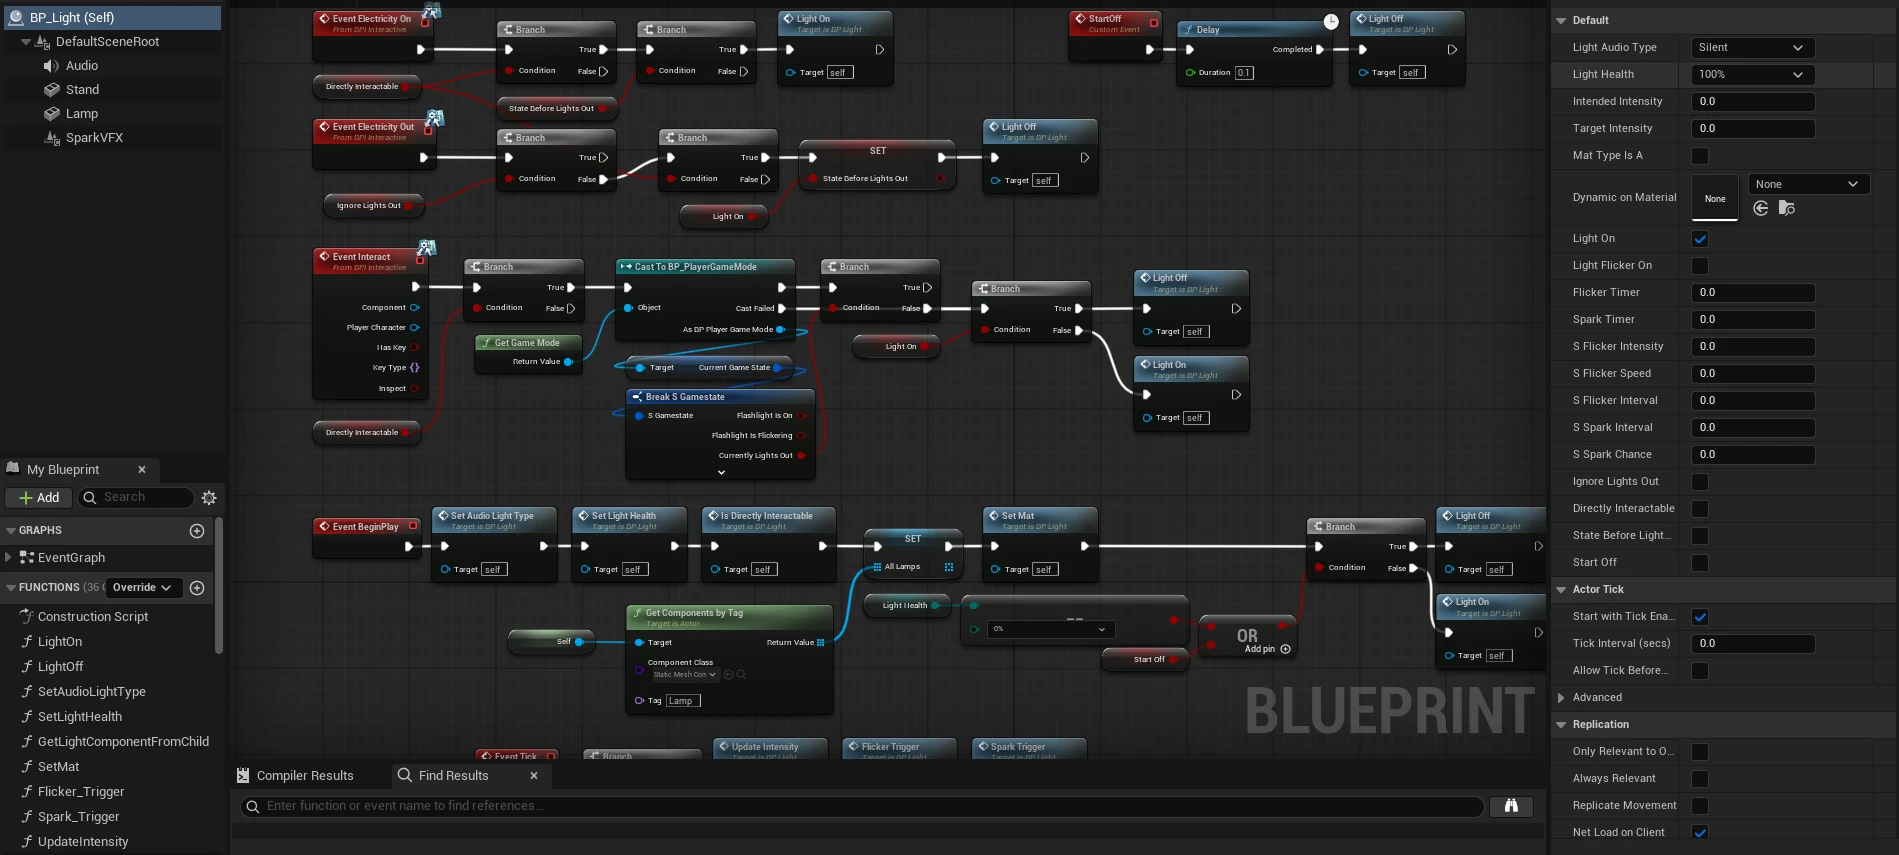
The light system puts every rect, spot and point light under one parent blueprint. A light can be turned on from a switch or by clicking the light itself, and lamps swap between on and off materials to match. Its light health has 6 levels, from 100% with no flicker or sparks, through 90%, 60%, 40% and 10% with bigger flickers and more common sparks, down to 0% with no light at all. Each level sets the flicker intensity, speed and interval and the spark interval and chance. On every flicker the light picks a random target intensity and eases towards it, and on every spark interval it rolls against the spark chance before firing the sparks. The light’s audio type is Silent, Fluorescent or Tungsten, which sets the hum it plays. When the electricity is cut, every light remembers whether it was on and turns off, unless it’s set to ignore power cuts, and the breaker turns them back to how they were. Any light can also be set to start the game switched off. It replaced a lot of per-light setup scattered across the project, and meant Matty could adjust every interactable light in the same way.
For most of the game the main light source is the flashlight. I gave it a light function using one of David Gruwier’s flashlight textures (Gruwier, 2026), which I picked because it has real colour detail, where most are greyscale. It also has a fake fog beam, made of a wide and a narrow cone mesh, that only shows while it’s switched on, and a set of flicker patterns, from a single or double flick for scares to a dying battery that flickers until the player taps the flashlight. It aims at whatever a trace from the centre of the screen hits, and I extended that trace so it registers surfaces further away, which keeps the beam pointed at the middle of the screen. Up close to a wall, the flashlight angles in towards the centre instead of pointing straight ahead and clipping through it. I also fixed its scale so it stays the same whether it’s held or lying as a pickup.
Doors and openables
I made the single and double doors open and close on slightly offset curves, so the movement isn’t linear, and send a callback through the interactable interface when they finish opening, for any blueprint that needs to know. I also fixed their hinge direction and lock state, and the basement door uses a separate slam curve so it slams harder than the rest to make it clear something supernatural did it.
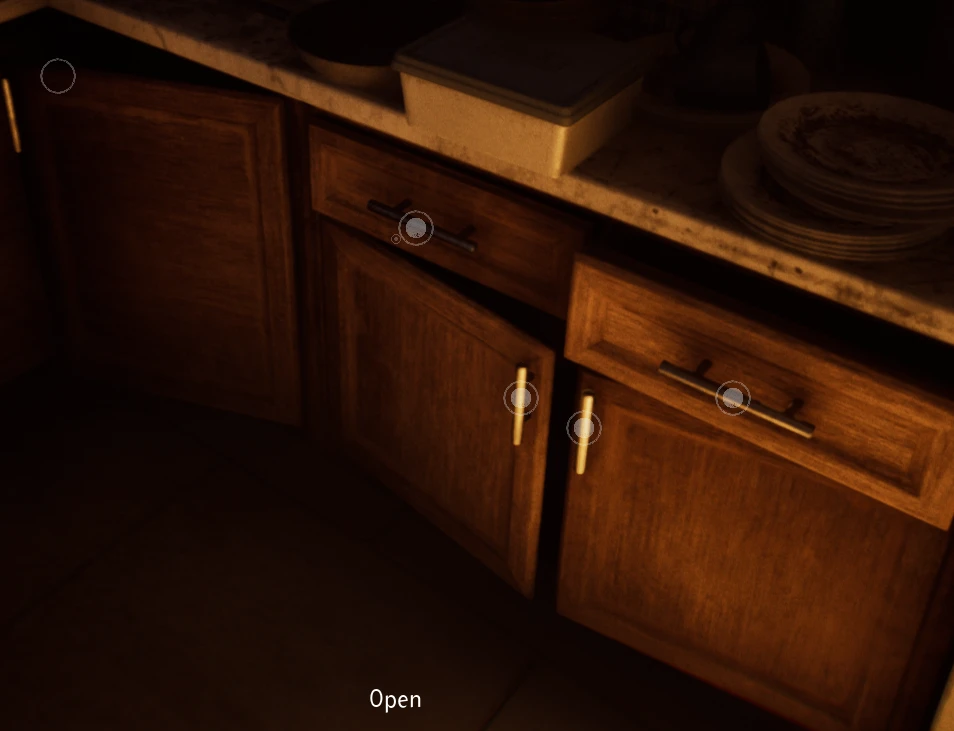
Cupboards, cabinets, tables, desks, the fridge and the oven use a generic openable instead, a custom static mesh component with an open and a closed transform that it lerps between on an easing curve when clicked, playing the sound the furniture passes in and swapping open and closed tags. Because the logic lives in the component, making something openable only means converting its old mesh component over, setting the two transforms, and having the furniture’s blueprint pass the click on to whichever part was clicked. If an artist places one partway open, it works out its progress between the two from either the location or the rotation difference and counts itself as open past 50%, so drawers and doors can sit in any position before the player touches them and still move the right way when clicked. One piece of furniture can have any number of doors and drawers, and I set up every interactable that uses it.
Generic openable’s parameters
Openable
Movement
- float
- bool
- object
- transform
The maths
On begin play, the component compares the closed transform’s location and rotation with the open transform’s and , with each rotation taken as a (roll, pitch, yaw) vector:
Whichever is longer decides how the part moves, so a drawer is judged by its location and a door by its rotation. The part’s placed location or rotation is projected onto that line from closed to open, which gives its progress as a fraction of the way there:
The part counts as open when . Each click sets the direction to to open or to close, and every tick moves the progress on by the frame time over the duration . The easing curve shapes it before the closed and open transforms and are blended, and the tick turns off again once reaches 0 or 1:
Inspectables and notes
Joel built item inspection, and I fixed its start angle, view size and scale, then reworked its render target capture to be much cheaper. I also fixed position and scale bugs on the notes, and made sure every note around the house used the right mesh, material and description.
Interaction icons
Near the end I added interaction icons, because players were mostly finding out what was interactable by trial and error. The icon is a world-space widget on a custom component, so any interactable gets one with almost no setup. Every tick it checks the distance from the camera, compares the camera’s forward vector with the direction to the icon, and traces a line to make sure nothing is in the way. The outer ring fades in when the player is nearby, the inner fill fades in when they’re looking at it, and both fade out again when they look away. Icons hide during cutscenes, while the game is paused or the player is in a puzzle, and on anything set as unavailable.
The telephone
The telephone’s voicemail cuts the power. Joel made the telephone and the light that blinks until the player walks up to it. I added the waiting sound and the tone before the message, and the subtitles at the end of it, and Kanye added the power outage sound once the message finishes. After that, my logic records in the game state that the voicemail has played, tells every interactable that the electricity is out, thickens the fog and changes the post-process for the blackout, and turns off the phone’s interaction icon.
The TV
I also built the interactive TV shown on the Project UMBRAE cover. It has dynamic lighting, audio and a cathode-ray tube (CRT) shader on the screen, shows either the main menu or a video, and goes off with the rest of the house when the power is cut. The news feed starts at a random point, and while the TV is off it stores the time it was switched off, so turning it back on seeks forward by the time that has passed and picks up where the live feed would be. I built the main menu to fit inside the TV’s screen, with the same shader on top, blending the camera onto the screen and locking the player’s movement and cursor while it’s open. The TV and cutscene manager handle the transition from the menu into the start of the game.
CRT shader
The CRT effect on the TV screen and the main menu is a shader from Fab (CemTezcan, n.d.), which I adapted for both. I changed its input to the media texture from the TV’s media player, so the effect is applied to the video as it plays, and made a second version as a user interface material, because a widget can’t use a surface material. The UI version uses a masked blend mode with an opacity offset and sits over the main menu widget, which gives the menu the same look as the screen around it. I then tuned the scanlines, phosphor mask, glow, noise and signal distortion on the two material instances to nail the appearance.
Puzzles
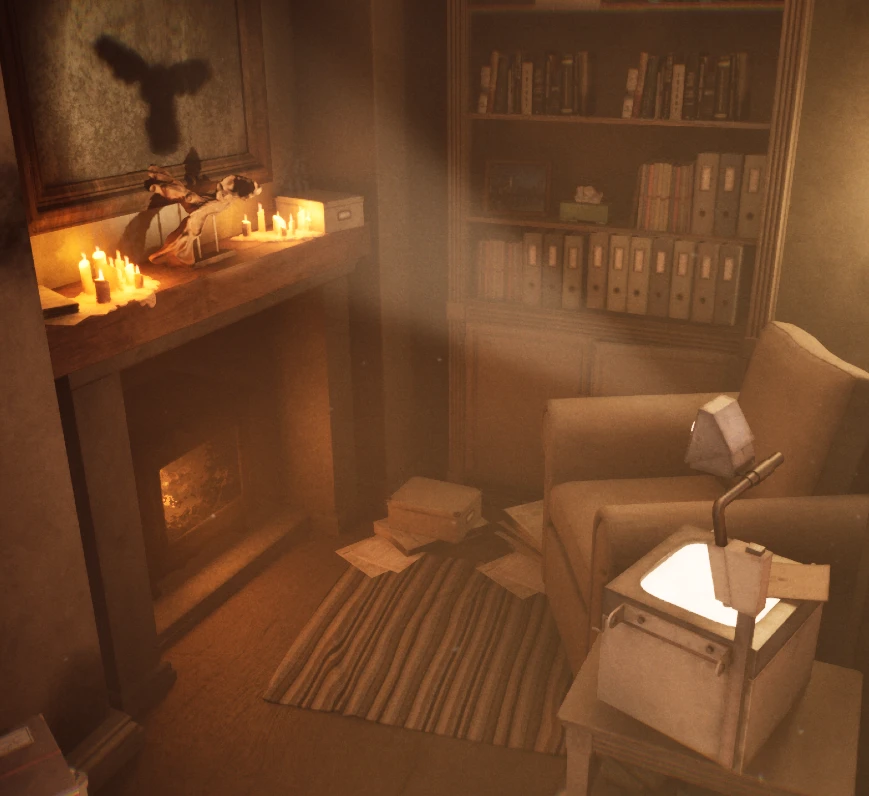
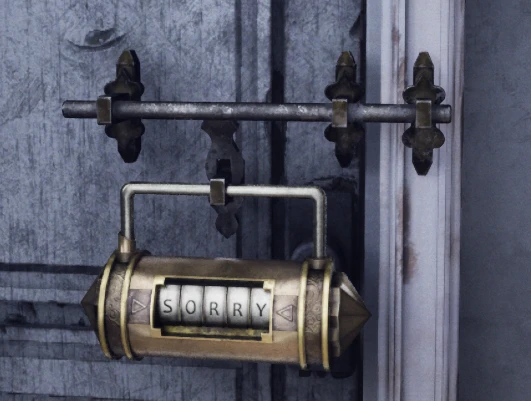
The bird shadow puzzle is solved with a projector, which I made fully interactable. I set up its light, adjusted the puzzle to use the projector, and connected it to the electricity and interaction systems. I also did the technical side of all the puzzle cutscenes, like the clock hands, the breaker switch and the sink, through the cutscene manager. On the word padlock, I helped fix the dial and made the logic that opens the door once it’s solved, playing Sam’s dial animation as it opens.
Audio
Footsteps
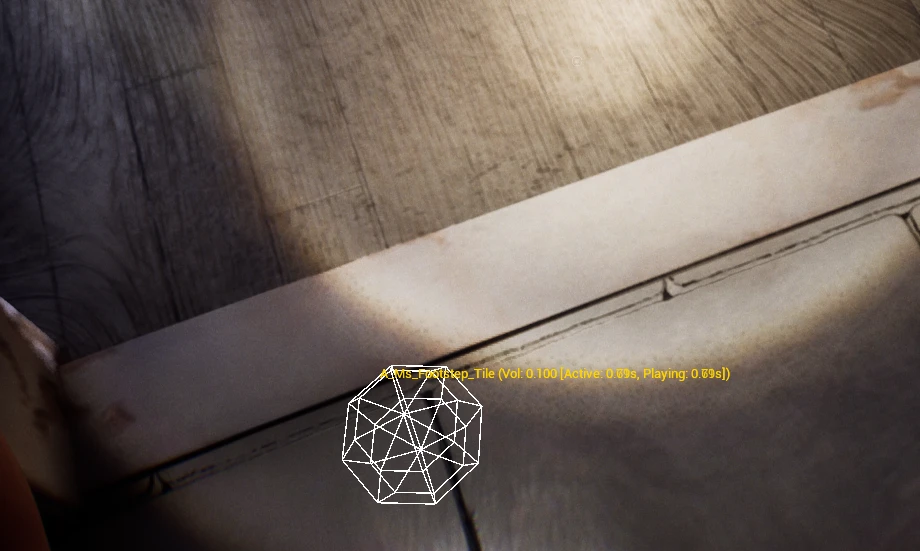
Kanye set up the first footsteps as an animation notify that played one 2D sound. I built the surface system on top of it. I did a pass of physical materials so every floor returns the right surface type, and made each notify trace down from the foot bone it names, read the physical surface it hits, and play the wood, concrete, carpet, tile or tunnel MetaSound at that foot. I built those MetaSounds with random sound, pitch and volume, and made the footsteps quieter and spatialised with shared footstep attenuation so they sit in the space. I also adjusted the notifies on the player’s walk animations, so every one plays its footsteps at the right place and time.
Ambient audio
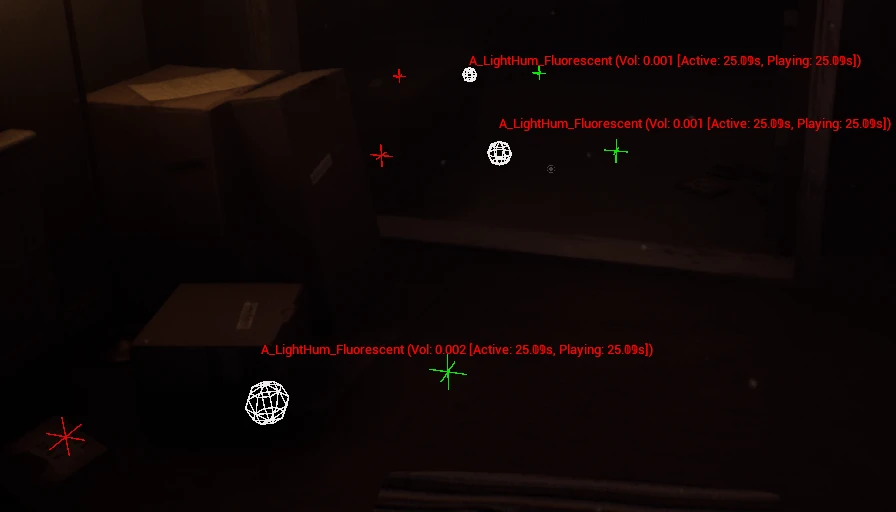
I set up the attenuation settings for most of the audio in the game, so distance, spatialisation and reverb behave correctly around the house. I also implemented the ambient sounds other people made, including the weather, rain on the windows, the fluorescent light hum, the music box, the voicemail and the TV’s video and static.
The player
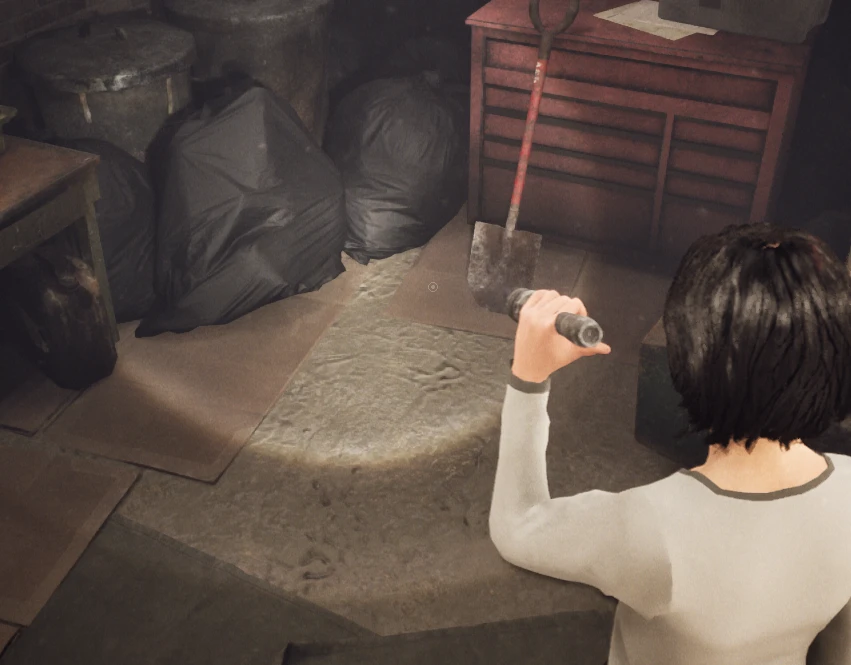
The player’s camera was the first thing I added when I made the first version of the project. It’s connected to the player’s neck bone, lerping its location towards the bone and lerping towards the control rotation, so the head bob comes from the animation itself and the camera follows it with smoothed, slightly delayed movement. A rail caps how far the camera can lag behind the bone, and the rotation is clamped so the player can’t look down past their chest or straight up. Players can change the strength of the head bob in the options.
When the team switched to MetaHumans (Epic Games, n.d.) in Week 9, setting up the MetaHuman system for the player and the creature was my job. A lot of the underlying systems had to be ported, and the switch broke them in subtle ways. Retargeting animations, migrating bones and fixing mesh detail settings took a lot of debugging, with Shanti’s help spotting issues. I set up MetaHuman for Amy, showed Amy how to use it and found the right videos for making MetaHuman clothes. I set the player up to take its meshes straight from Amy’s export location, so nobody had to swap them by hand after every update to it.
I helped the animators get the player’s movement animations working and solved technical problems like the sockets. I also got the first-person scaling working, hid the head and hair meshes from the player’s view so the camera doesn’t clip into them, and carried the head bob and camera over to the MetaHuman player.
Scrapped features
Portal prototype
Early on, the team wanted non-Euclidean spaces, so in Week 2 I built a proof-of-concept portal to show everyone how it would look and work, leaving performance for later. Dev Squared’s video (Dev Squared, 2023) showed me how a walk-through portal is set up in UE5.
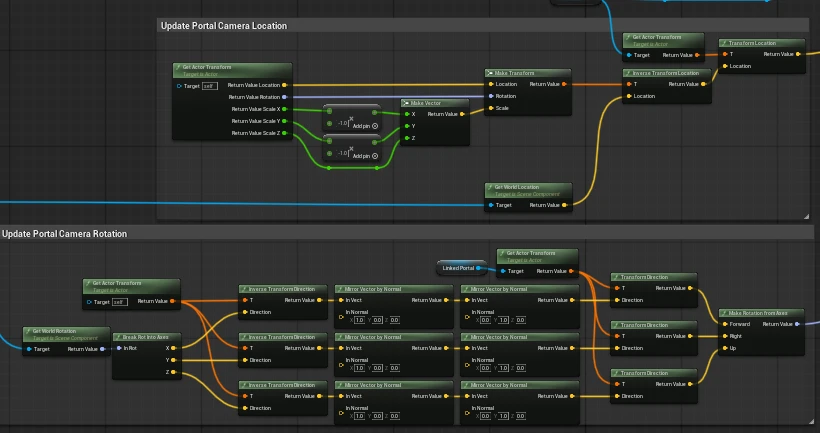
Each portal shows a render target filled by a scene capture at the linked portal. When the player is nearby, the capture copies the player camera’s position and rotation relative to the other portal, so the view moves the way it would through a hole in the wall. Most of it is done with inverse transforms and Mirror Vector by Normal: the camera is taken into the portal’s local space, mirrored, and transformed back out through the linked portal. A clip plane on the capture cuts away anything between the capture and the linked portal, and the render target is sized from the viewport times a quality setting, resizing when the viewport changes, with captures throttled by a timer.
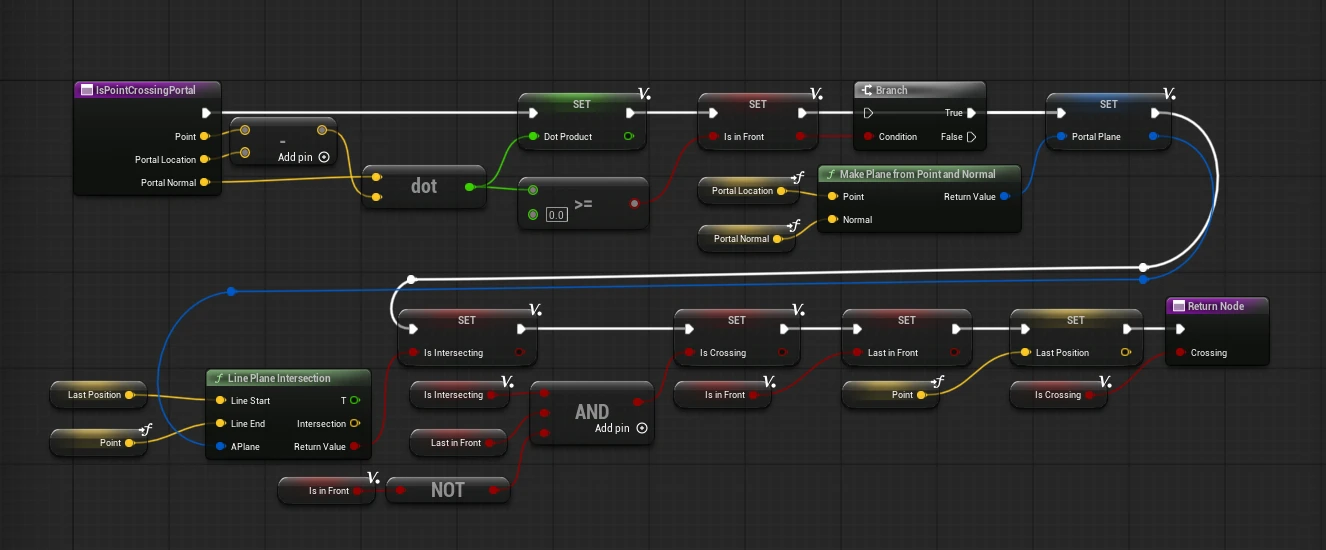
Teleporting works the same way: it mirrors the player’s location and the camera’s location and rotation relative to the portal, carries the player’s velocity through to the other side, and flags a camera cut on that frame so motion blur and temporal effects don’t smear across the jump. To stop the player being teleported back and forth, the teleport waits for the exact moment they cross the plane. That check kept failing at first, because I’d set up the line plane intersection in the wrong direction.
Mirrors and the portal decision
We also wanted high-fidelity mirrors, which needed the same accurate view of the scene as the portals. I compared screen space reflections (SSR), the Lumen cache, planar reflections and cubemaps, and every option was either expensive or low quality.
I took the options to the team and we settled on a mix. Mirrors use the high-quality planar reflection with Lumen only in cutscenes, switching to it partway through while the player is looking away from the mirror, and the cheaper planar reflection with SSR on muddy surfaces everywhere else. High-quality planar reflections are very expensive, so using them in normal play would have needed heavy culling and restricted player movement to optimise those scenes, and keeping them to cutscenes gave us exact control over the camera and what it sees. Portals became duplicate rooms, with doors as the teleport points. The portal prototype worked, but its cost ruled it out for the full game, so the non-Euclidean spaces were cut along with it.
Other cuts
The game designers’ early prototypes for a light-based sanity system and a VHS camera were dropped at the same stage after feedback, with the camera going first, which let us focus on the core puzzles and exploration. As production went on, the house was cut down for the same reason: each week we weighed the remaining scope against the time left and removed any room that wasn’t essential, which took out the laundry room, the downstairs bathroom, the attic and the chase area.
Problems and fixes
- Interactables resetting after cutscenes - Doors, lights and items the player had interacted with went back to their starting state after a sequence played. Getting those states to survive the cutscene took the most work of anything in the cutscene manager, and a save and restore pattern solved it.
- Foot placement and broken virtual bones - The player’s foot placement inverse kinematics (IK) had been disabled early on because of broken virtual bones. After the switch to MetaHumans I fixed it and turned it back on.
- Control rigs in level sequences - The MetaHumans’ control rigs misbehaved when they were animated in level sequences, and I fixed them.
- IK feedback loop - In the last few weeks I set the player up for EnviroSense, a plugin that uses procedural animation to attach the hand to whatever it’s touching. I scaled it back to fit the time left and tried to get it working for just the flashlight, which was probably the hardest case. The flashlight was attached to the player through a socket, and the IK then tried to move the hand to the flashlight, so each one drove the other in a loop and the arm spasmed out of control. Bigger priorities took the final weeks, so it didn’t make it into the game.
- Editor and packaged builds disagreeing - The stone door and the clock worked in the editor but broke in builds, because cast timing is slightly different in a packaged build. They now retry their casts if the first attempt fails.
Reflections
I’d build the event system fully in Week 5 instead of Week 15. The overhaul got rid of a lot of duplicated logic, but every event built before it still had to be migrated to the new system. The generic openable came late as well. Because its logic lives in the component, switching furniture over to it took some time but was well worth it.
The MetaHuman player was my first real technical animation work, and its setup was fragile enough to need more bug fixing than almost anything else on the project. I’m more confident with animation now and definitely learnt a lot, but it isn’t an area I want to focus on going forwards.
Sources
CemTezcan (n.d.). Advanced CRT TV - VCR - VHS Effects. [online] Fab. Available at: https://www.fab.com/listings/9e92ed72-dd27-4079-a982-83bf2928034b [Accessed 19 Oct. 2026].
The CRT shader I adapted for the TV screen and the main menu.
Dev Squared (2023). Seamless Portals made in Unreal Engine 5. YouTube.
Portals working in UE5, through camera reprojection and render targets.
Epic Developer Community (n.d.). Checking if player is looking in a specific direction?. [online] Unreal Engine Forums. Available at: https://forums.unrealengine.com/t/checking-if-player-is-looking-in-a-specific-direction/423325.
Research for the Look At condition.
Epic Games (n.d.). Getting Started with MetaHuman Creator. [online] Epic Developer Community. Available at: https://dev.epicgames.com/documentation/en-us/metahuman/getting-started-with-metahuman-creator [Accessed 20 May 2026].
Guide to using MetaHumans.
Gruwier, D. (2026). DGruwier Flashlight Textures. [online] Gumroad. Available at: https://dgruwier.gumroad.com/l/dgruwier-flashlights [Accessed 22 May 2026].
The flashlight's light function texture, with refraction.
SideFX (n.d.). Vertex Animation Textures for Unreal. [online] SideFX. Available at: https://www.sidefx.com/tutorials/vertex-animation-textures-for-unreal/ [Accessed 15 Oct. 2026].
The official tutorial I followed to set up the VAT exports and their materials.