Breakdown 3 of 4
The Unreal toolset
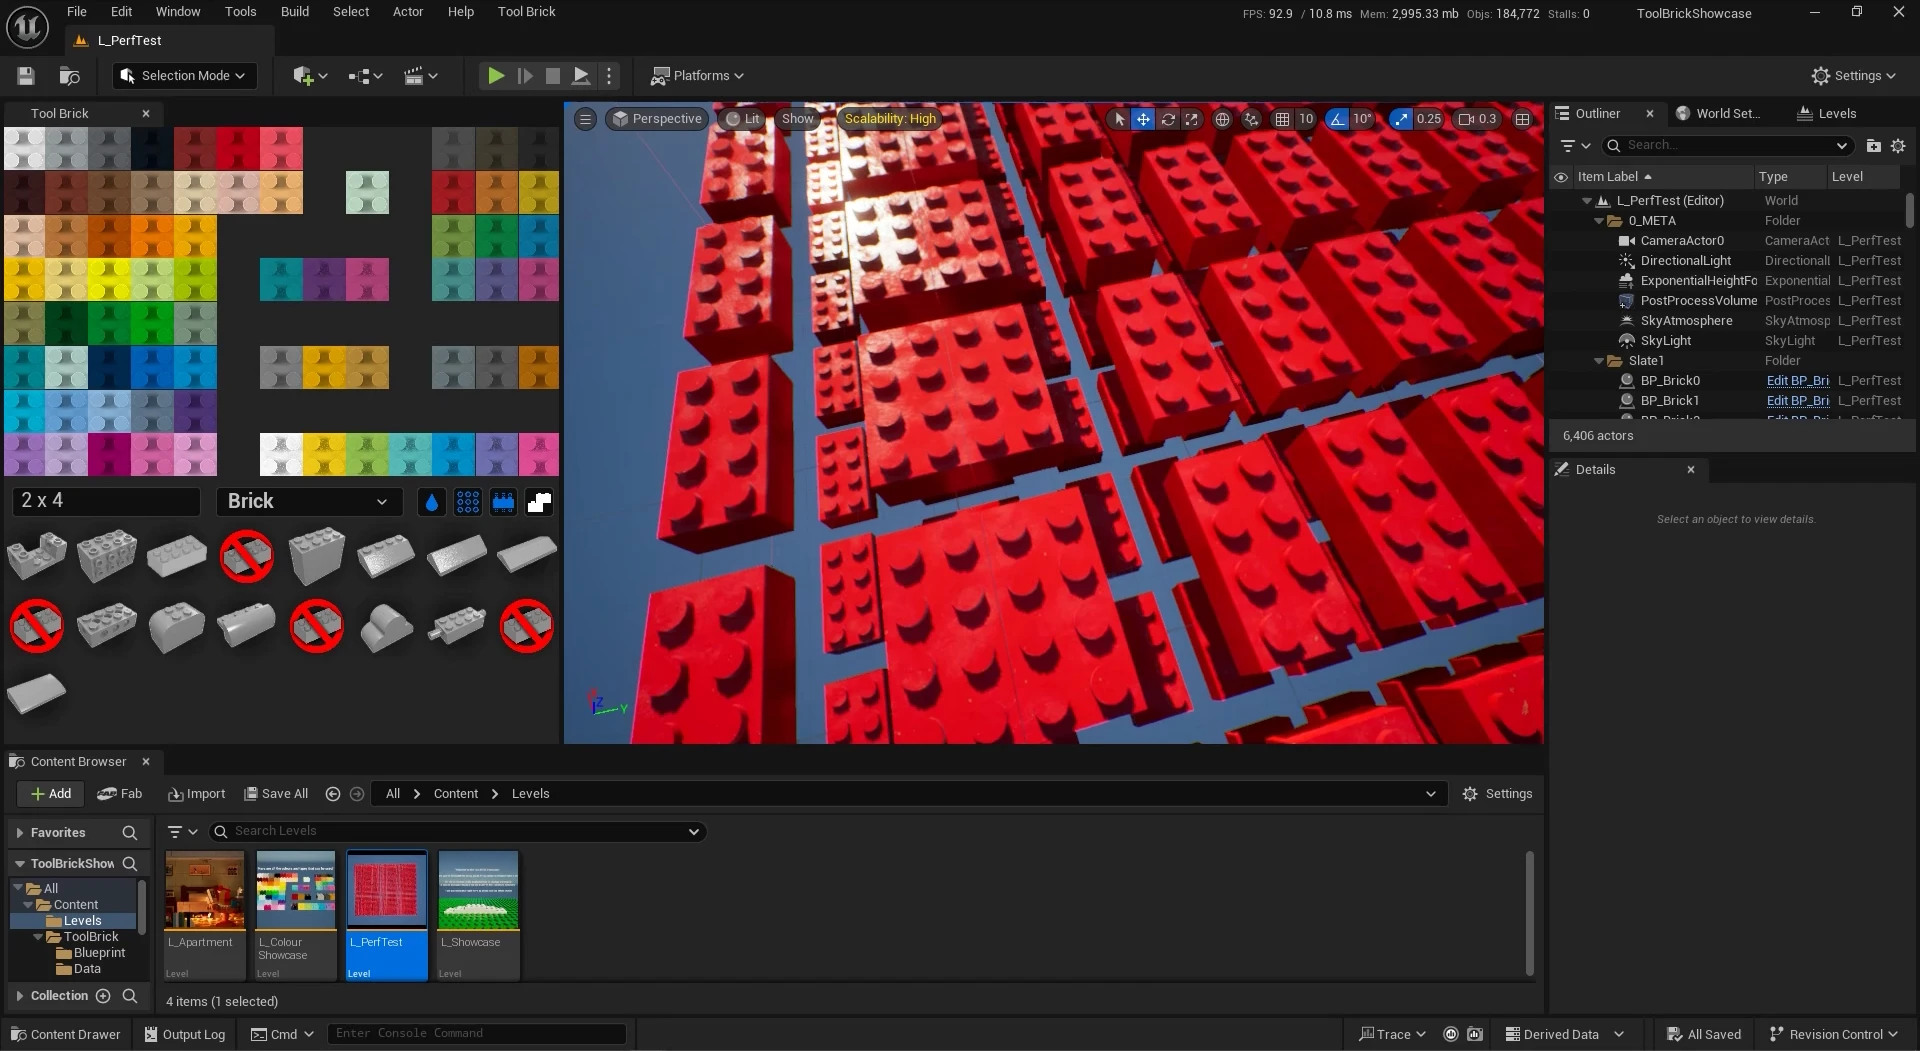
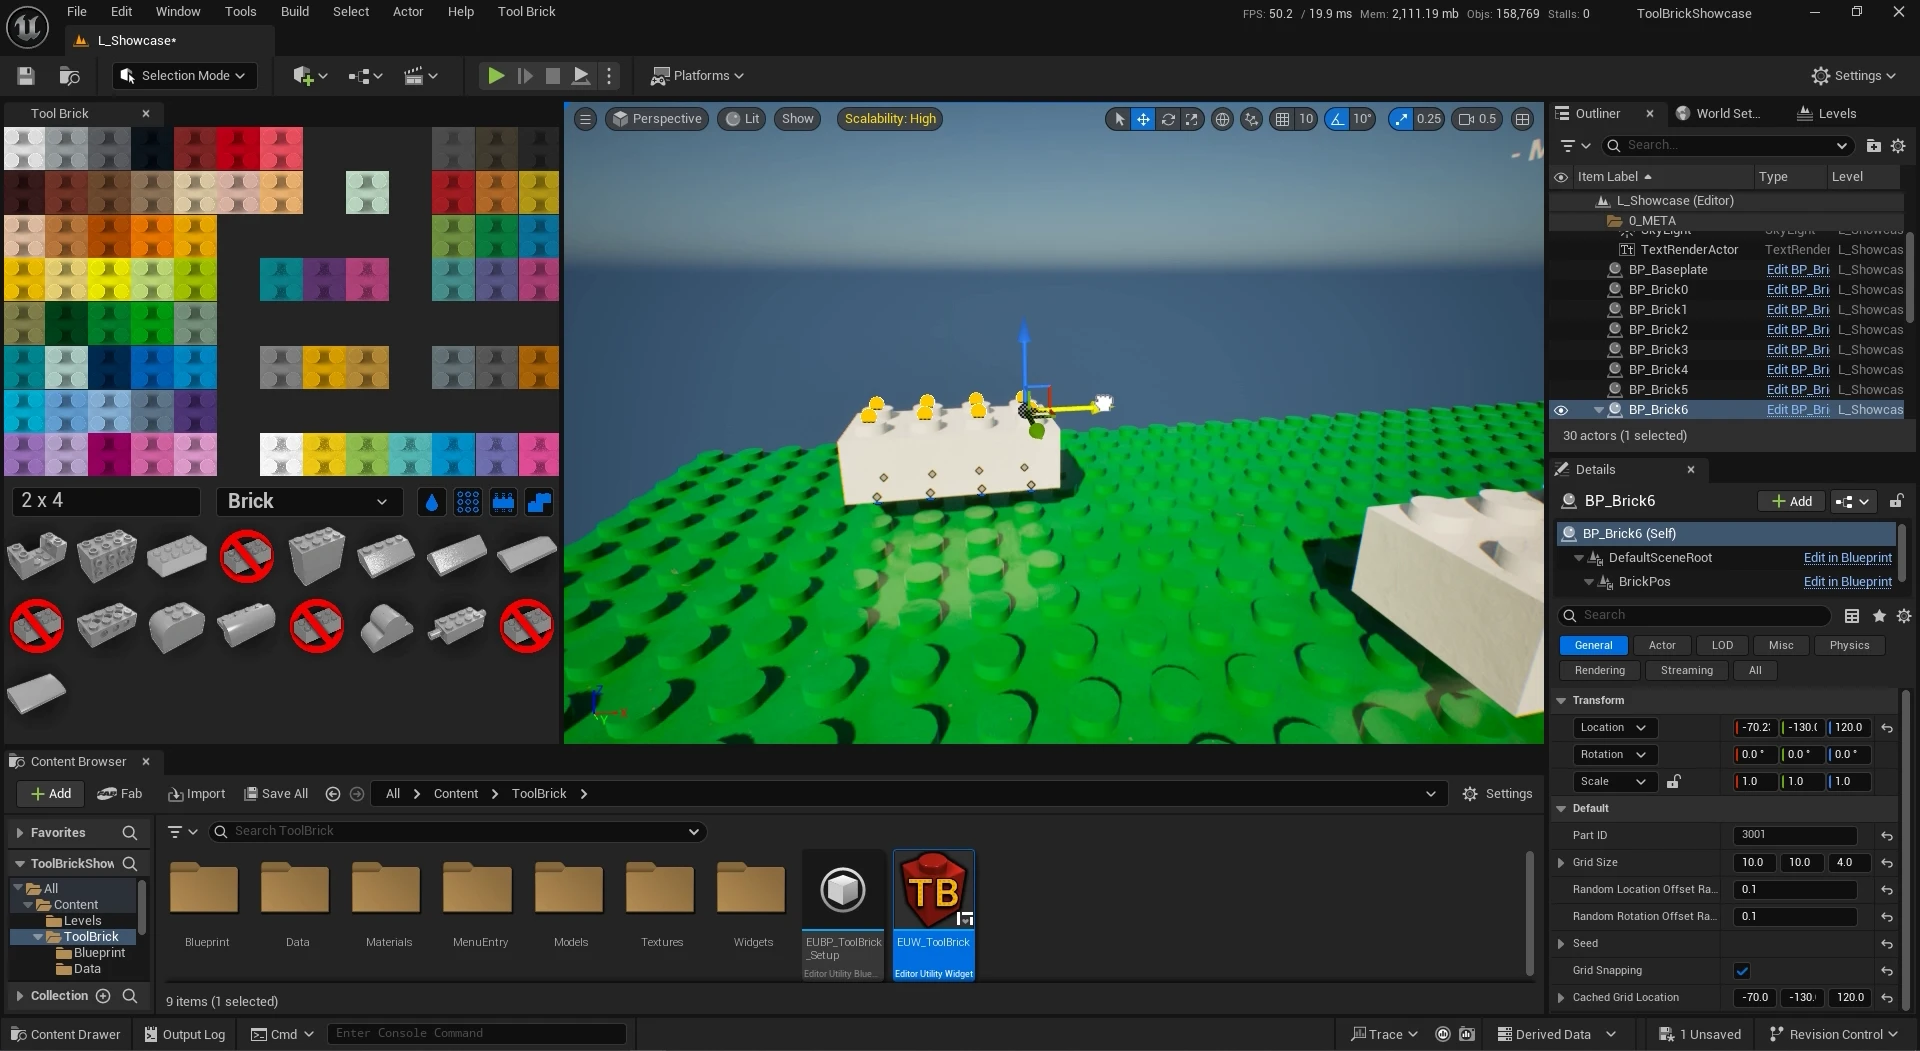
The in-editor toolset artists build with: search, 73 colours and stud snapping, holding 92.9 FPS with 6,406 actors in the editor.
Overview
This is the only part of Tool Brick an artist ever sees, so I wanted it to feel like part of the editor. It’s an Editor Utility Widget built with Unreal’s Editor Scripting Library, entirely in Blueprint, and it opens from a Tool Brick tab on the menu bar.
The part browser
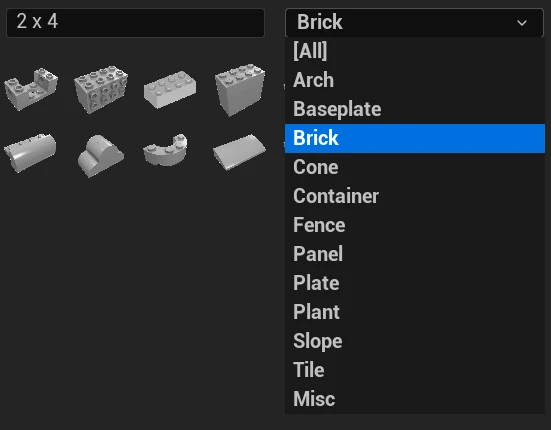
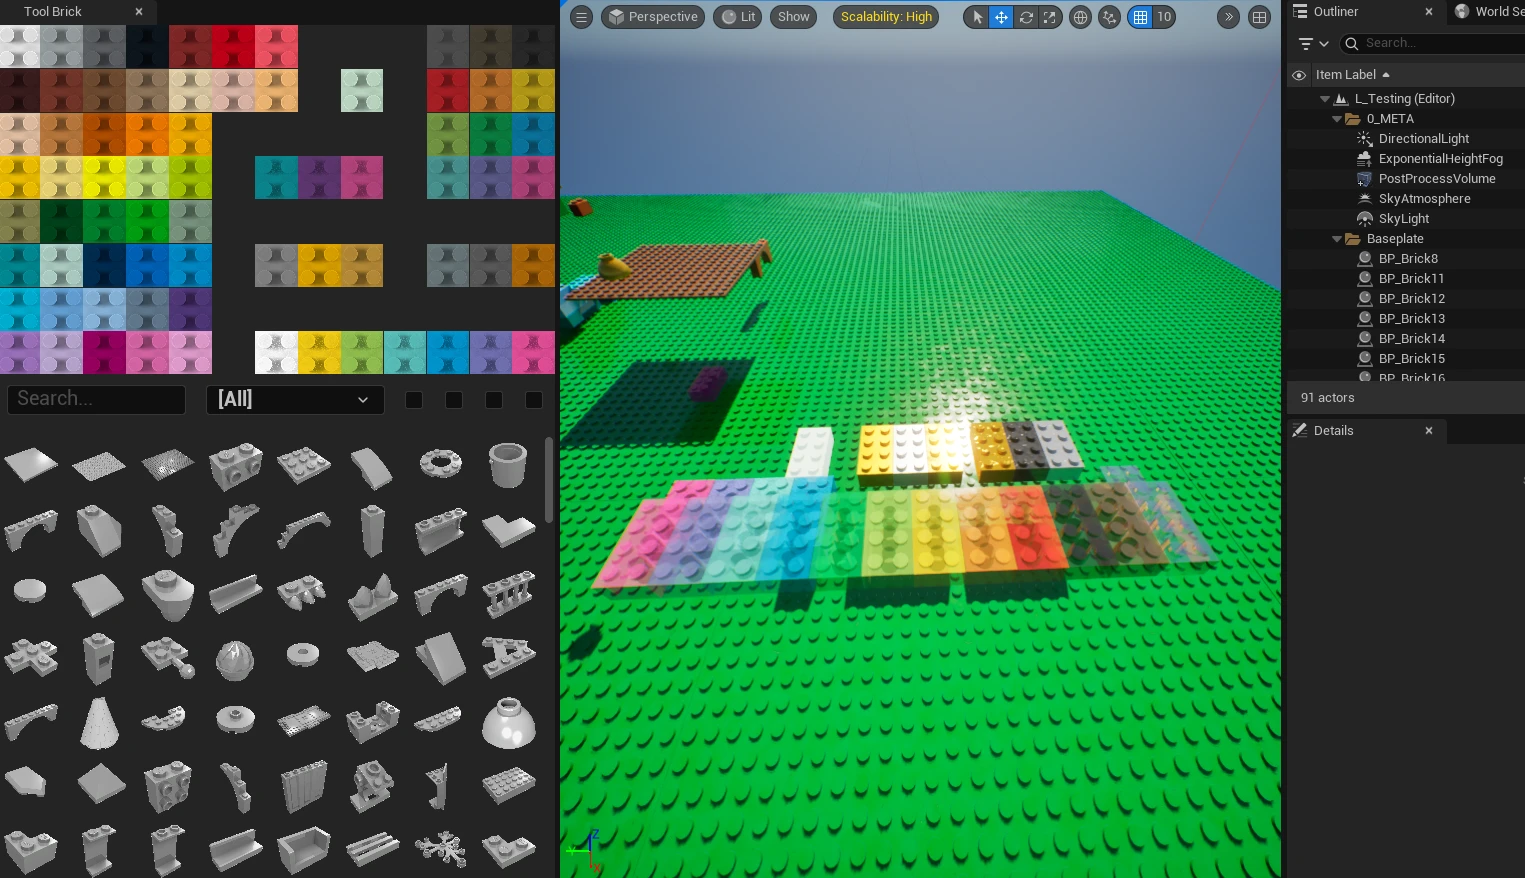
A data table imports the part list JSON from the Python stage and finds each part’s mesh and thumbnail in the content browser. The widget makes a UMG tile for each part, with a search box and a category dropdown on top.
To keep it responsive, the part objects are cached the first time they’re created, and tiles are only built for parts that match the current search. It stays quick even with thousands of parts, and finding one is faster than digging through the content browser. Parts without a thumbnail get a crossed out placeholder.
Placing bricks
Placement isn’t as friendly as the content browser, since there’s no drag and drop. As a compromise, it raycasts from the editor camera, places the brick on the first surface the viewport is looking at and selects it straight away so you can move it.
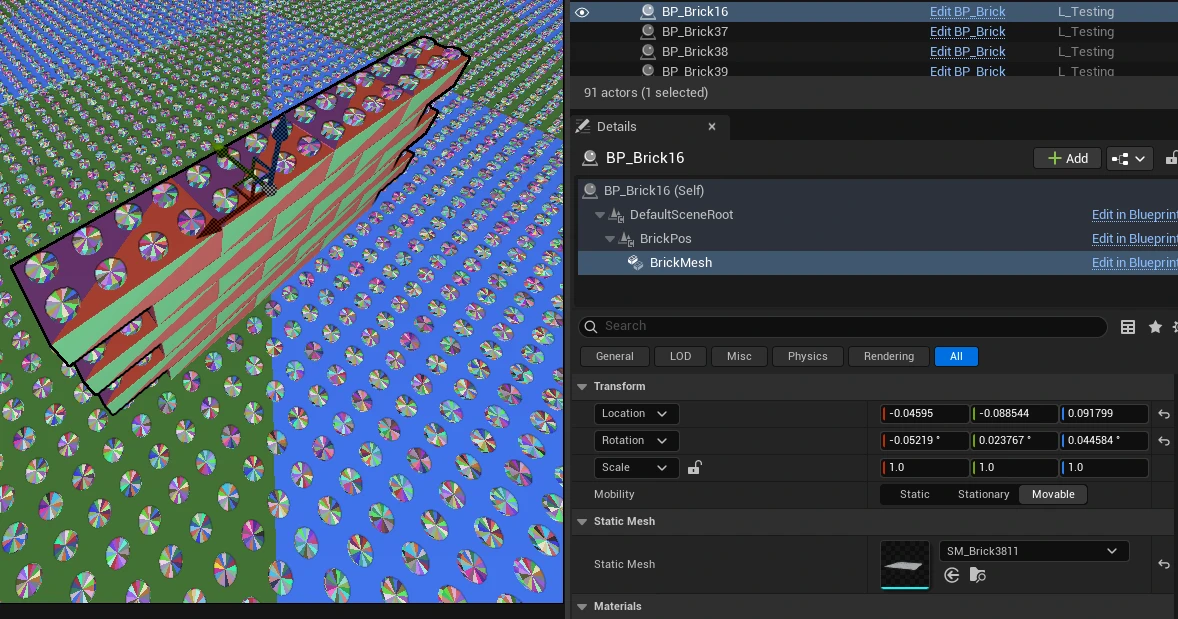
Every part is a Blueprint holding its mesh as an instanced static mesh, letting Unreal batch copies of the same part, and the meshes use Nanite to keep all their detail while staying cheap to render.
To check it held up, the release includes a performance test level, a field of red bricks. Flying around it in the editor at High scalability, the stat readout stayed between 80 and 93 FPS (10.7 to 12.5ms a frame).
Imperfection
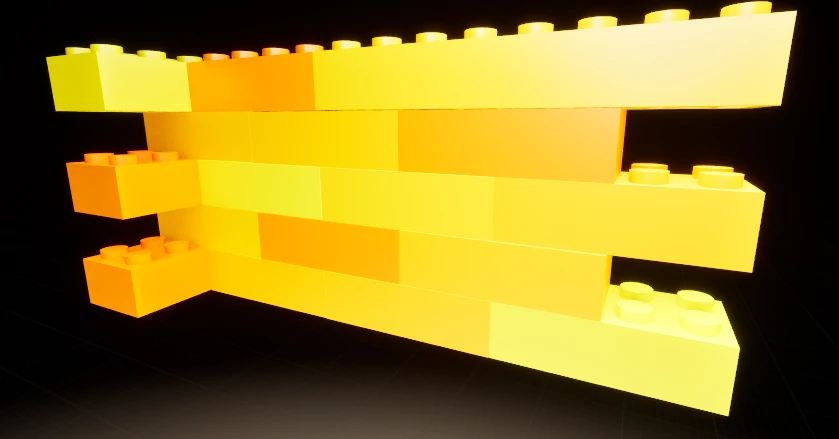
Bricks snap to a 10 x 10 x 4 grid, one stud across and one plate high (the maths is on the Houdini page). Real bricks are never placed perfectly, though, and they’re made slightly undersized to leave some tolerance between them. So every brick is scaled down to 0.99 and given a small random offset in position and rotation. BrickNerd’s Oscar Cederwall goes into the odd sizes and tolerances behind this in more detail (Schefcik, 2022).
The brick values below are from a 2 x 4 in the showcase level, and the saved state is the config file that ships with the release.
- float
- bool
- vector
- int
- string
- random stream
BP_Brick
- Part
- Grid
- Imperfection
ToolBrickConfig.json
- Browser
- Toggles
Colours
LEGO has released hundreds of colours, so I used BrickLink’s colour guide (LEGO Group, 2024) to decide which to include. A colour had to be from the main LEGO series, in current production and used on more than 100 parts, or be an active special colour. I also used BrickLink’s colour names throughout, since different platforms often name the same colour differently. That left 73:
The swatches are laid out as top-down bricks, like BrickNerd’s Chris Clarke laid out the 2023 palette, and Chris’s research into each colour’s hex code is what got the solid colours right (Clarke, 2023). Each colour is its own material instance, which also lets Unreal batch them.
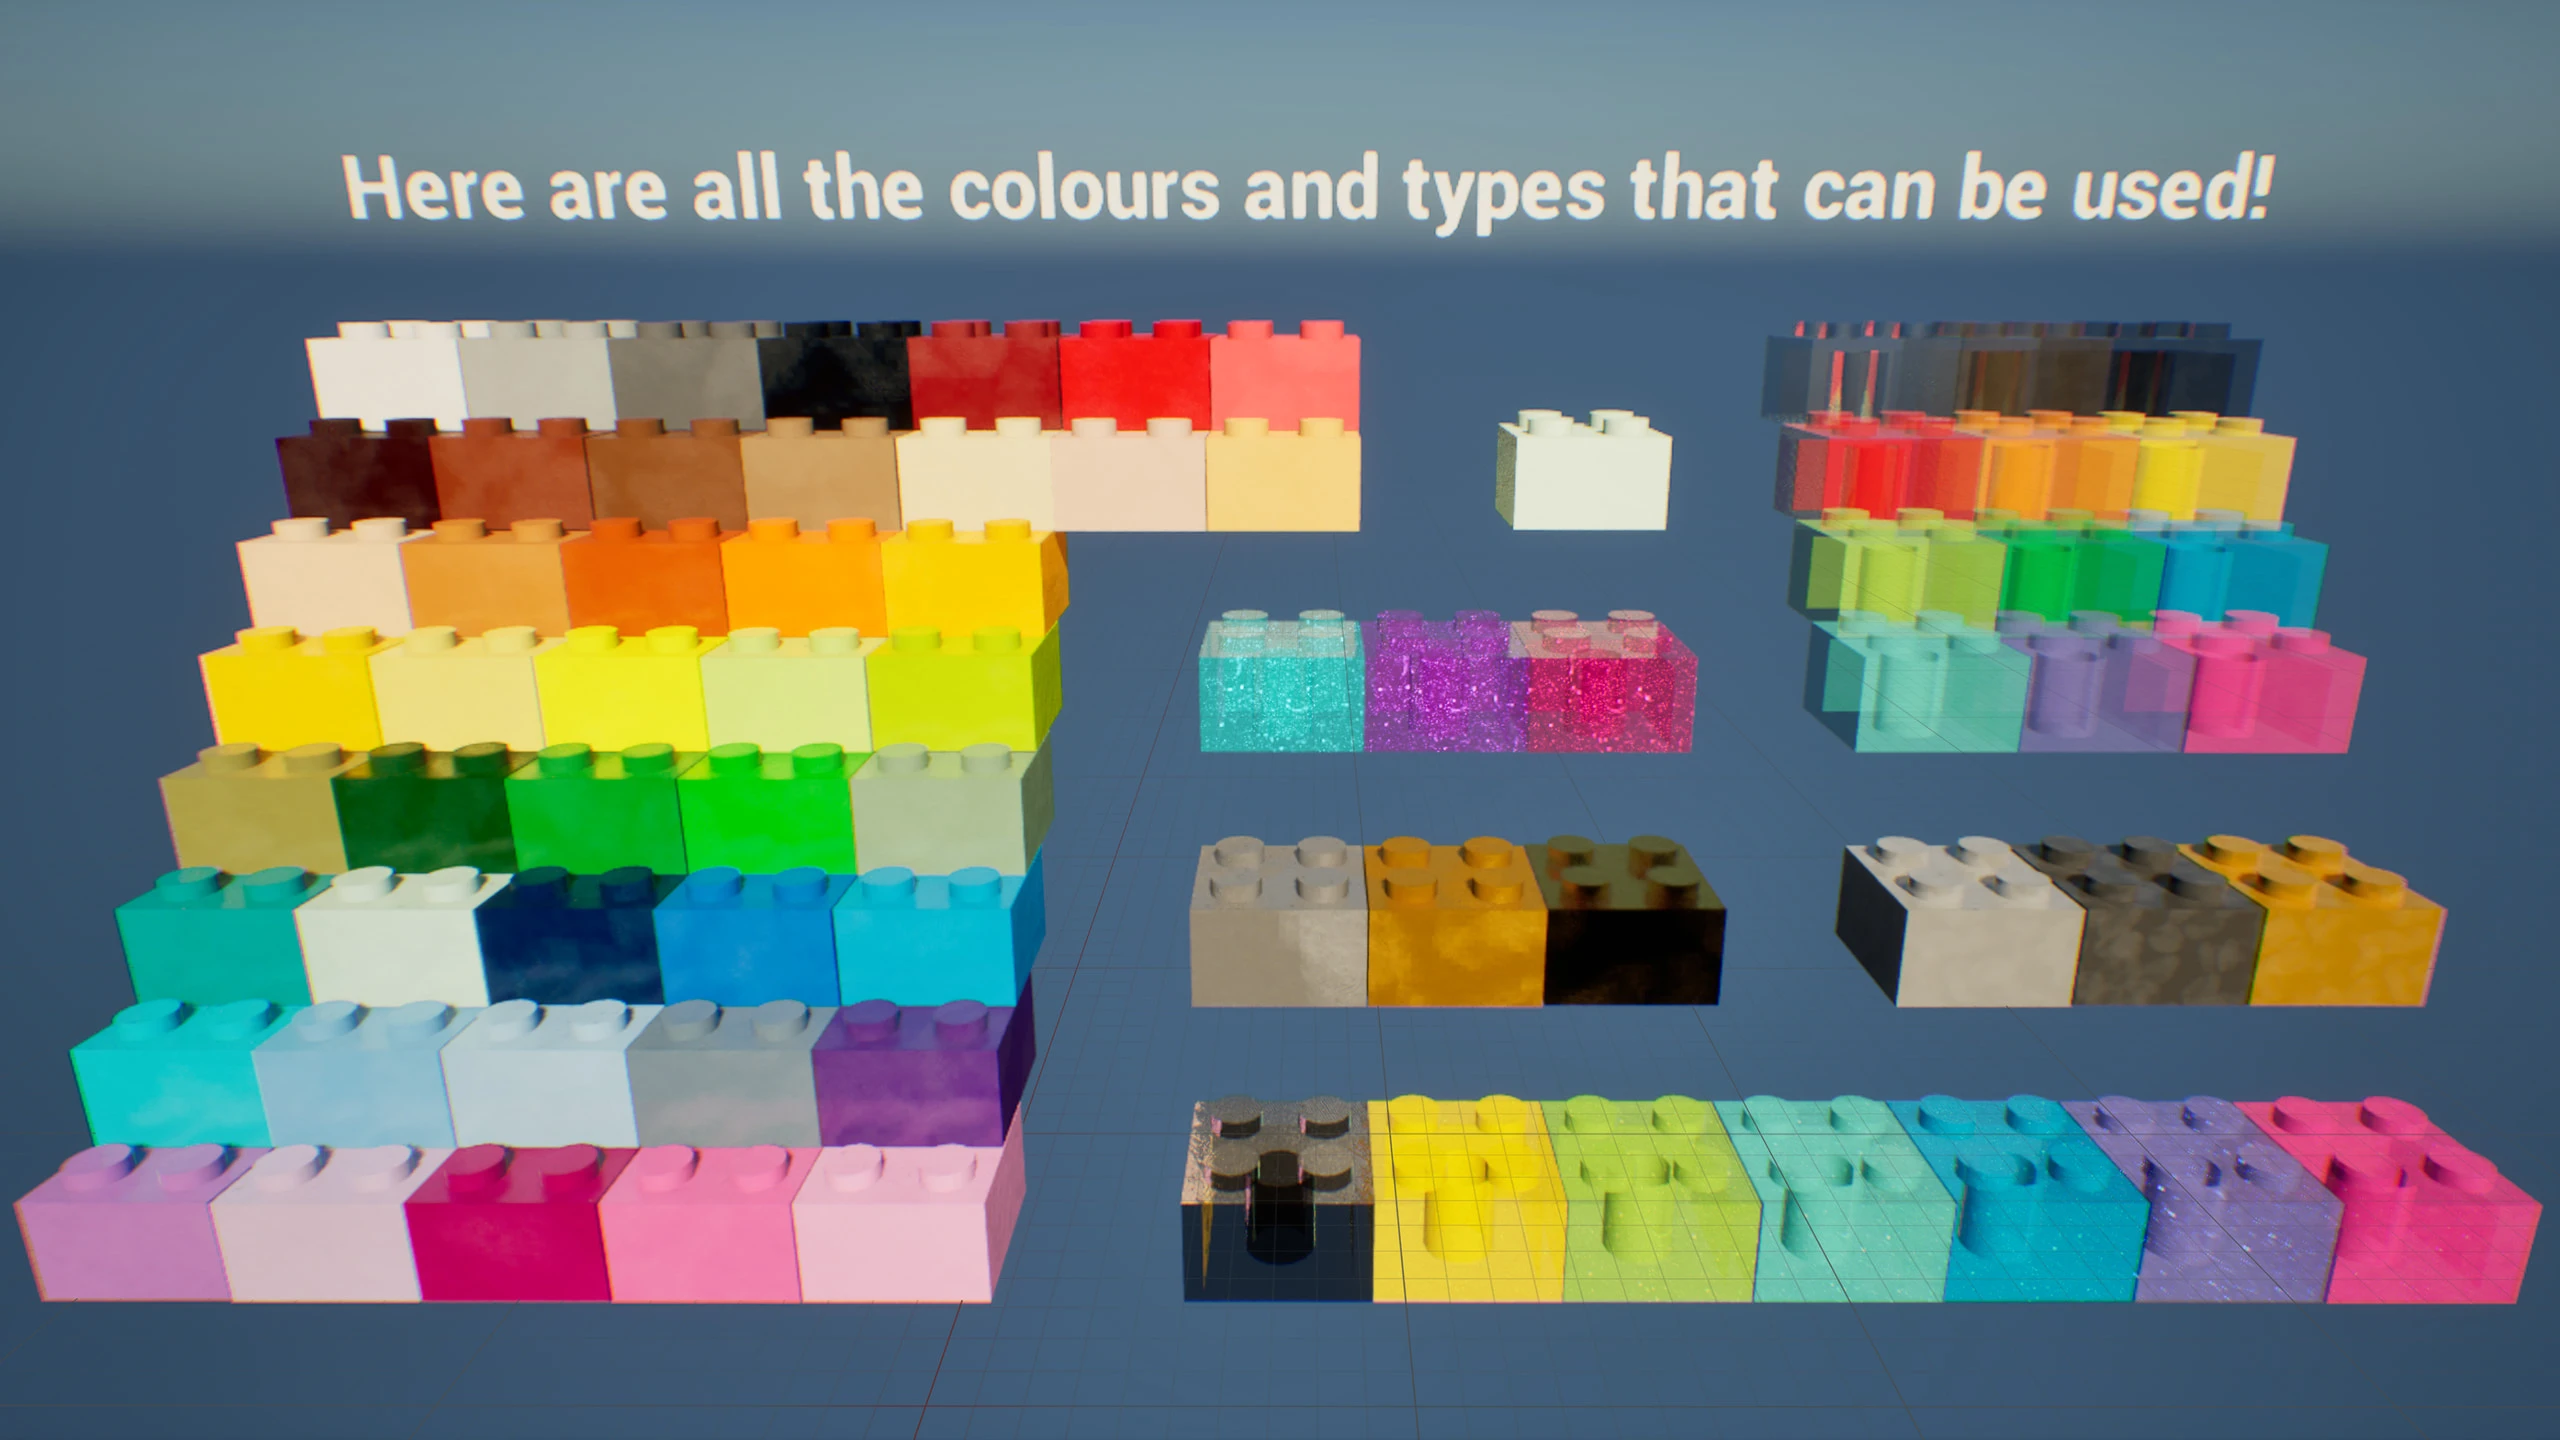
The active colour applies to whatever you place next, and the part tiles are tinted to match. With a brick selected, clicking a swatch recolours that brick too.
The master material
For realism I relied on Stefan Müller, who has been studying LEGO materials since 2016 and breaks down what makes a brick look real on Stefan’s CG Blog (Müller, 2019). Not all of it works in real time without baking textures for every part, so I took the parts that do: the roughness breakup, scratches, dust and fingerprints.
An opaque master came first, for the solid colours, then a translucent master for the transparent ones.
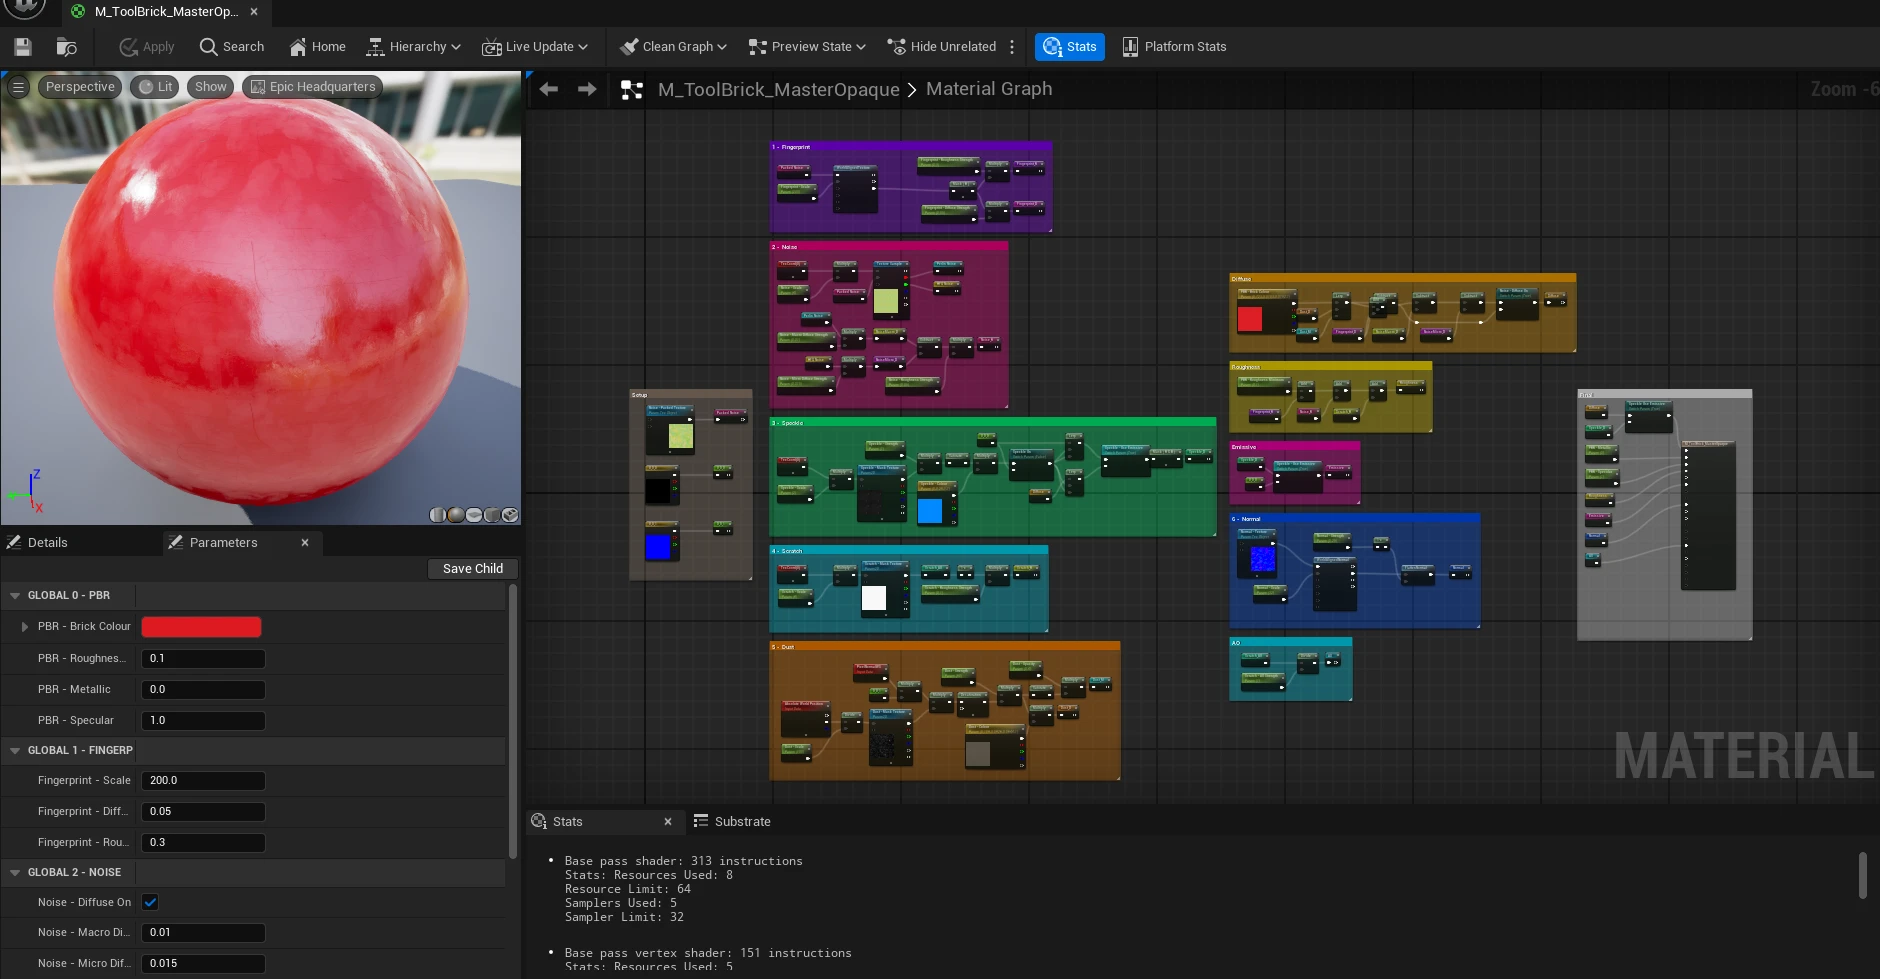
The surface textures are ambientCG’s Smear 002 (ambientCG, 2018), Cornelius Dämmrich’s glossy maps (Dämmrich, 2025), Chris Spooner’s film dust textures (Spooner, 2018) and TextureCan’s fingerprint texture (TextureCan, 2024).
Stud snapping
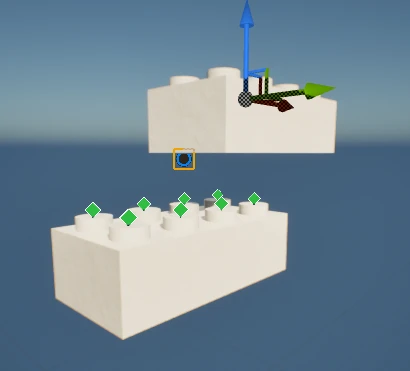
When you select a brick, the tool spawns a snap handle on every stud the Houdini network found, and you can move the brick from any of them. Once you pick one, handles that can’t connect to it are removed, and clicking one of the rest snaps the two bricks together by those studs. A small data table decides which stud types can connect to which.
Toggles and save state
Once the MVP worked, I had the tool playtested and used the feedback to decide what to change next. Testers wanted to place bricks off the grid and snap them together by their studs, see which colour they had selected, have the tool remember its state, and get more categories to search by. Most of this section came out of that round.
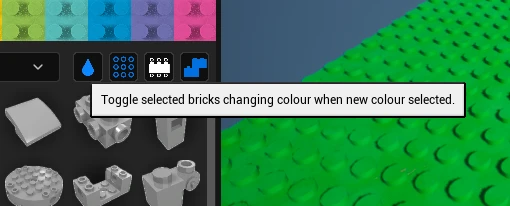
Four toggles above the part list switch the main behaviours on and off: recolouring selected bricks, grid snapping, selecting studs and snapping by studs. The widget also saves its state to JSON, so closing the editor doesn’t reset everything.
Reflections
- Snap handles as actors - Each handle is its own Blueprint actor attached to the brick, and anything with a lot of studs, like a big baseplate, gets laggy to move. Turning stud points off stops the lag, but the proper fix is moving the handles inside the brick as components.
- No Nanite for translucent parts - Nanite doesn’t support translucent materials, so transparent colours cost more than solid ones and are best used sparingly in a big build. Traditional LODs for them are the likely fix.
- The limits of Blueprint - In C++, bricks wouldn’t need a Blueprint just to hold their instanced mesh, the tool could read the mouse position for proper drag and drop, and the JSON could be read back efficiently.
There are a few small bugs too, like an unnecessary warning when you delete a brick while its handles are showing, and part tiles without a thumbnail sometimes picking up the colour tint when you scroll.
Sources
ambientCG (2018). Smear 002. [online] Available at: https://ambientcg.com/view?id=Smear002 [Accessed 24 Nov. 2025].
Smear texture in the master material.
Clarke, C. (2023). The LEGO Color Palette: 2023 Edition. [online] BrickNerd. Available at: https://bricknerd.com/home/the-lego-color-palette-2023-edition-1-24-23 [Accessed 23 Nov. 2025].
The swatch layout, and the hex codes for the solid colours.
Dämmrich, C. (2025). 8k Tileable Glossy Maps. [online] Gumroad. Available at: https://corneliusdammrich.gumroad.com/l/OYhL [Accessed 24 Nov. 2025].
Smudge and scratch maps in the master material.
LEGO Group (2024). Color Guide. [online] BrickLink. Available at: https://v2.bricklink.com/en-us/catalog/color-guide [Accessed 23 Nov. 2025].
Which colours made the cut, and their names.
Müller, S. (2019). Exploring LEGO Material Part 3. [online] Stefan's CG Blog. Available at: https://stefanmuller.com/exploring-lego-material-part-3/ [Accessed 23 Nov. 2025].
What makes a brick look real, and the basis for the master material.
Schefcik, D. (2022). LEGO SNOT Basics: Geometry, Techniques and Pitfalls. [online] BrickNerd. Available at: https://bricknerd.com/home/snot-basics-geometry-techniques-and-pitfalls-3-18-2021 [Accessed 23 Nov. 2025].
Oscar Cederwall's breakdown of the odd sizes and tolerances in LEGO geometry.
Spooner, C. (2018). 30 Free Film Dust Textures to Add Dirty Effects to Your Work. [online] Spoon Graphics. Available at: https://blog.spoongraphics.co.uk/freebies/30-free-film-dust-textures-add-dirty-effects-work [Accessed 24 Nov. 2025].
Dust texture in the master material.
TextureCan (2024). Fingerprint Imperfection Texture. [online] Available at: https://www.texturecan.com/details/212/ [Accessed 24 Nov. 2025].
Fingerprints in the master material.