Breakdown 1 of 5
Outline shader and VFX
I recreated the iconic ink outline with a post-process as well as every VFX in the game.
The look
I wrote the Art Style section of our art bible. The Borderlands franchise gets its comic book look (Gnomon, 2019) (Allcock and Kester, 2019) from bold, traditional PBR painterly comic esque textures, In the orginal games this was entirly hand-painted but later installements used a combination of ‘base’ layers painted or painterised realistic textures and then a hand-painted black ink pass (Full Sail University, 2020). This helped keep the look for much less work we adopted this approach as much as we could be creating substance painter templates and smart materials to get close. The post-process outline on top that pushes those lines further (Gearbox Software, 2020). VFX however does not not get outlines.
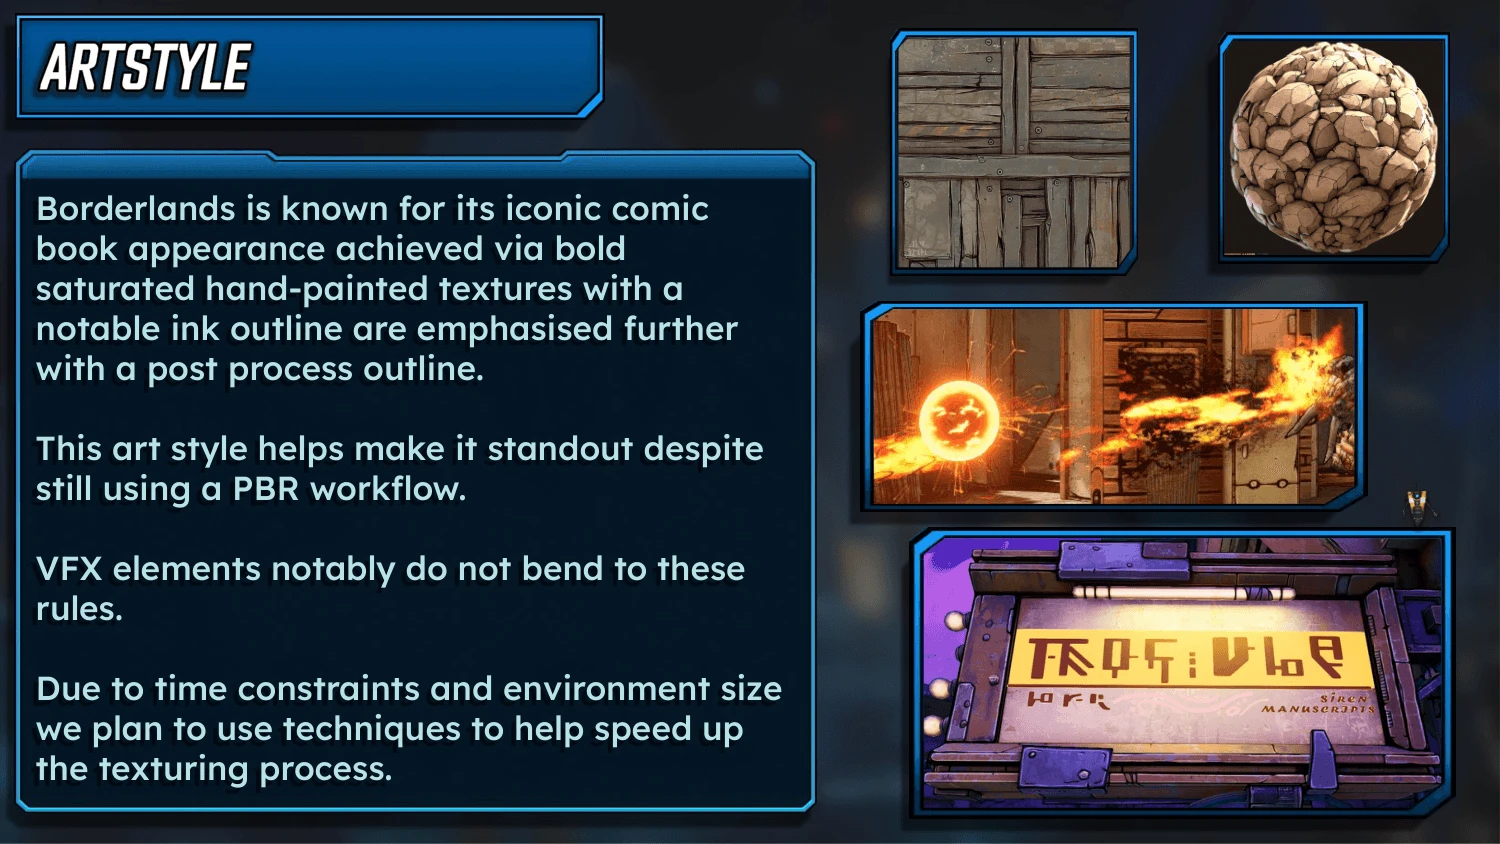
That means the game has two kinds of line. The artists painted the first kind into their textures, and the Opaque master material stops those picking up reflections. The second kind is drawn over the whole frame by a post-process. An early tech demo of Borderlands 3 from GDC 2017 explains the effect, and also shows cross-hatching and bloom that breaks up the lines (IGN, 2017). Both were toned down for the final game, probably because they made the image too noisy.
How the outline works
It’s a post-process material that finds edges in two buffers. Scene depth uses a threshold to dertemine a significant difference in depth which means a silhouettes. World normals catch creases, like panel lines and inner edges, where the depth barely changes but the surface turns useful on getting meshes internal details. (Unreal Engine, 2018)
Each band of the outline is one material function. For both buffers, it samples one step right, left, up and down, scaled by a thickness, then sums the differences, multiplies the total and raises it to a power. The two results are combined with a max, anything under a cutoff is thrown away, and whatever’s left blends the scene frame with the lines cut out.
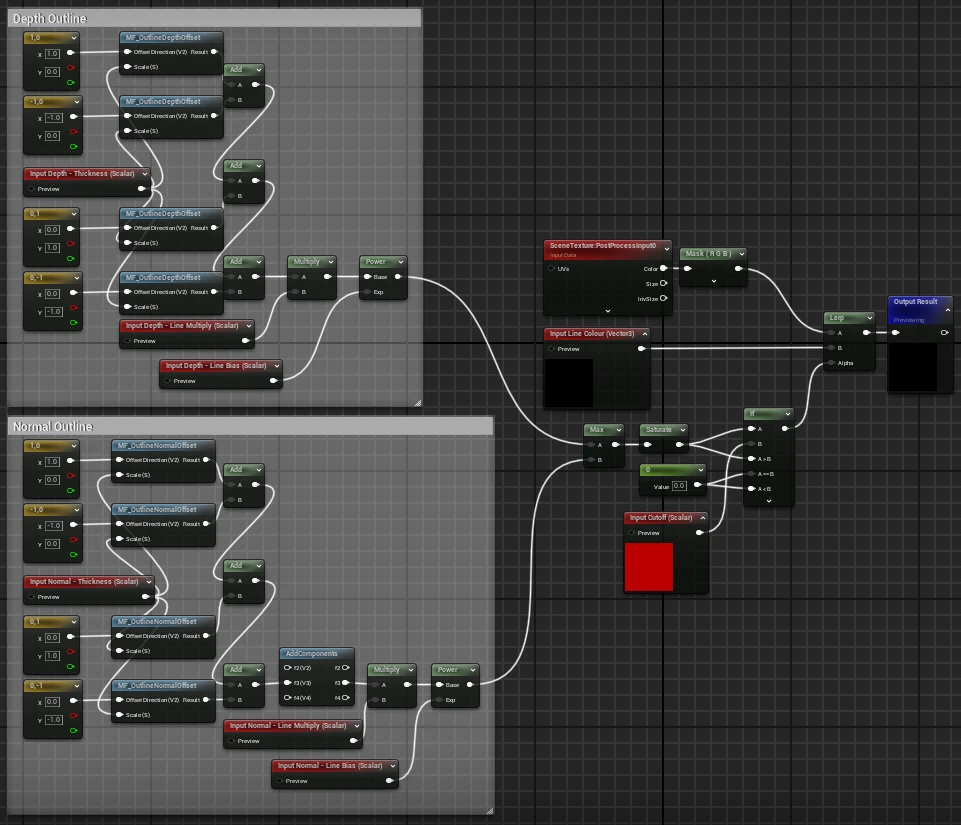
The maths
Written out per pixel , each buffer (depth, then normals) is sampled at four offsets , one pixel up, down, left and right, scaled by the thickness , then shaped by Line Multiply and Line Bias :
The stronger of the depth and normal edges (, ) becomes the line , anything under the cutoff is dropped, and what is left blends the scene colour towards the Line Colour :
Making a banded outline
The first version used one set of parameters for the whole screen and meant that as world normal and depth got less accurate at distance they could not be customised without also affecting near. To solve this he final version runs four copies of the function, one per distance band, each with its own thickness, multiply, bias and cutoff.
The nearest two draw depth lines twice as thick as the far two, and only the nearest draws thick normal lines, so the fine panel detail thins out with distance. This keeps the image cleaner and, ironically, more even. With textures turned off, the near normal lines are easy to see on the shallow panel seams.
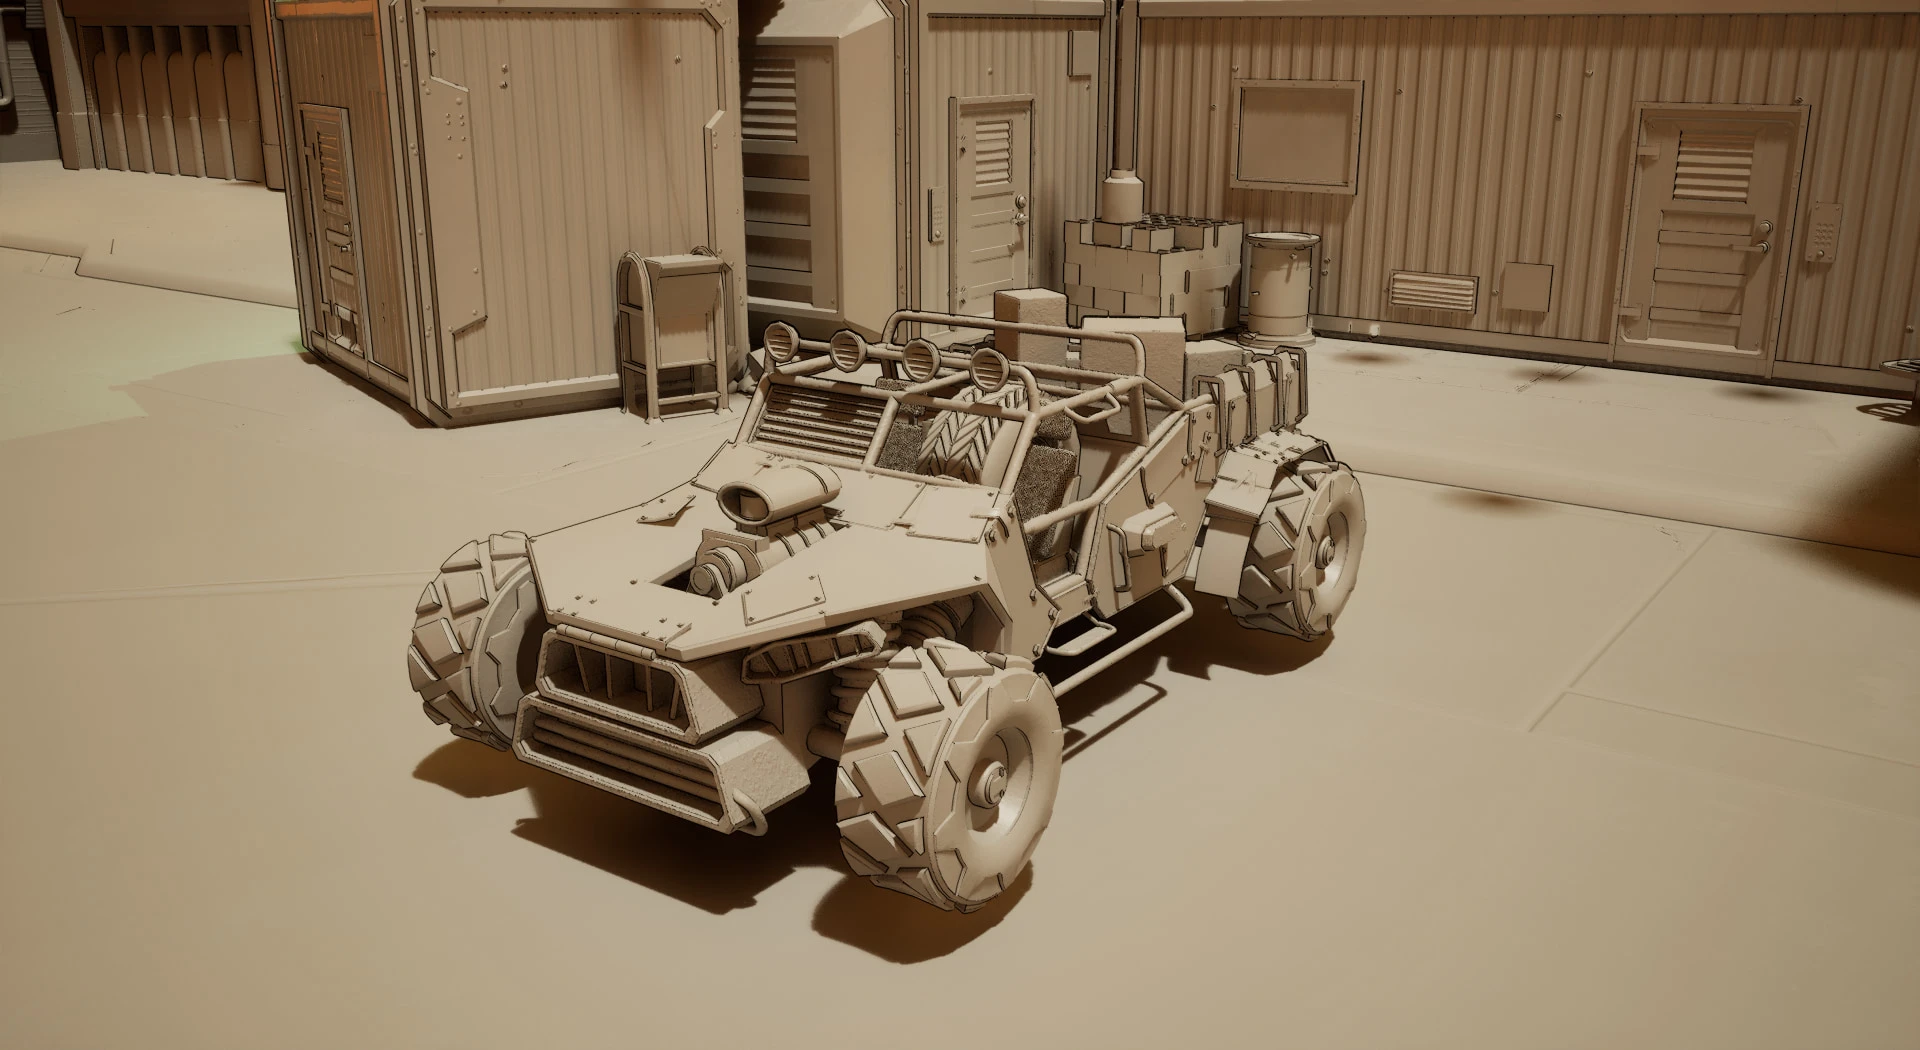
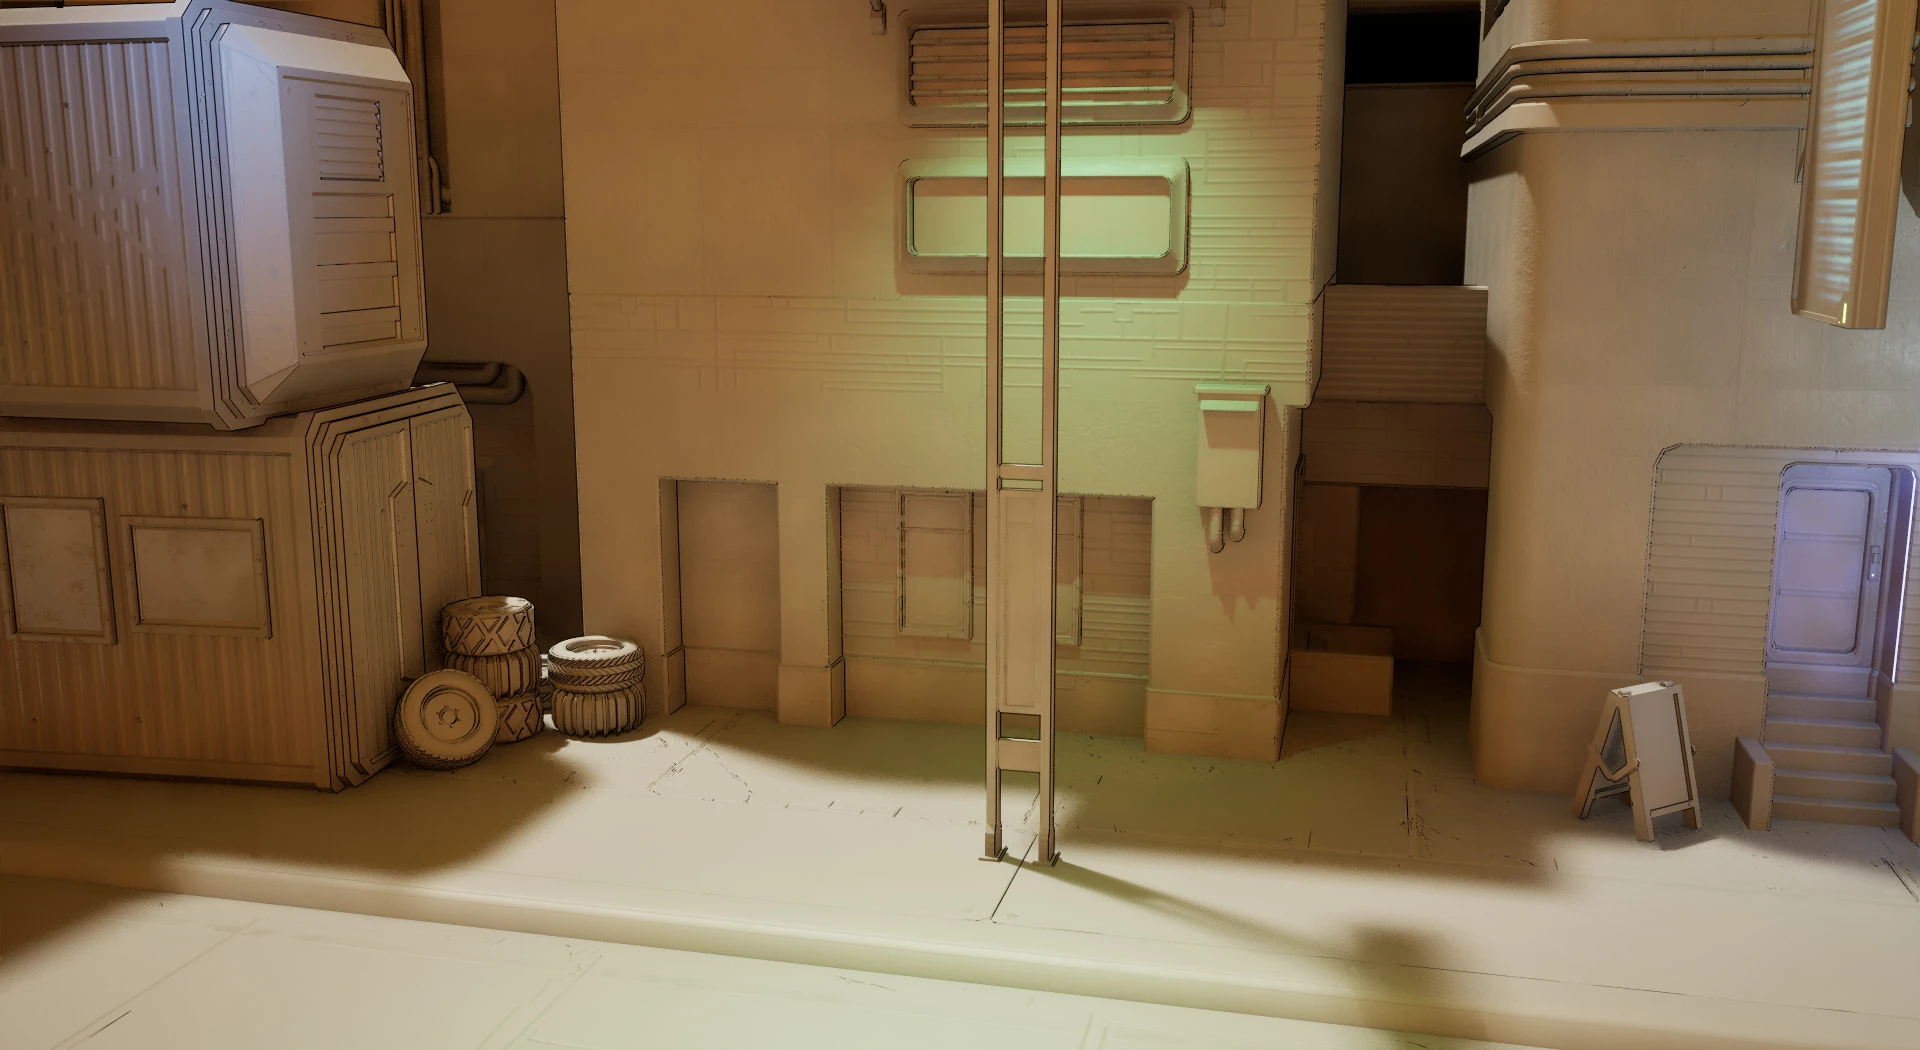
A Use Debug Colours switch draws each band in its own colour, to show where they hand over.
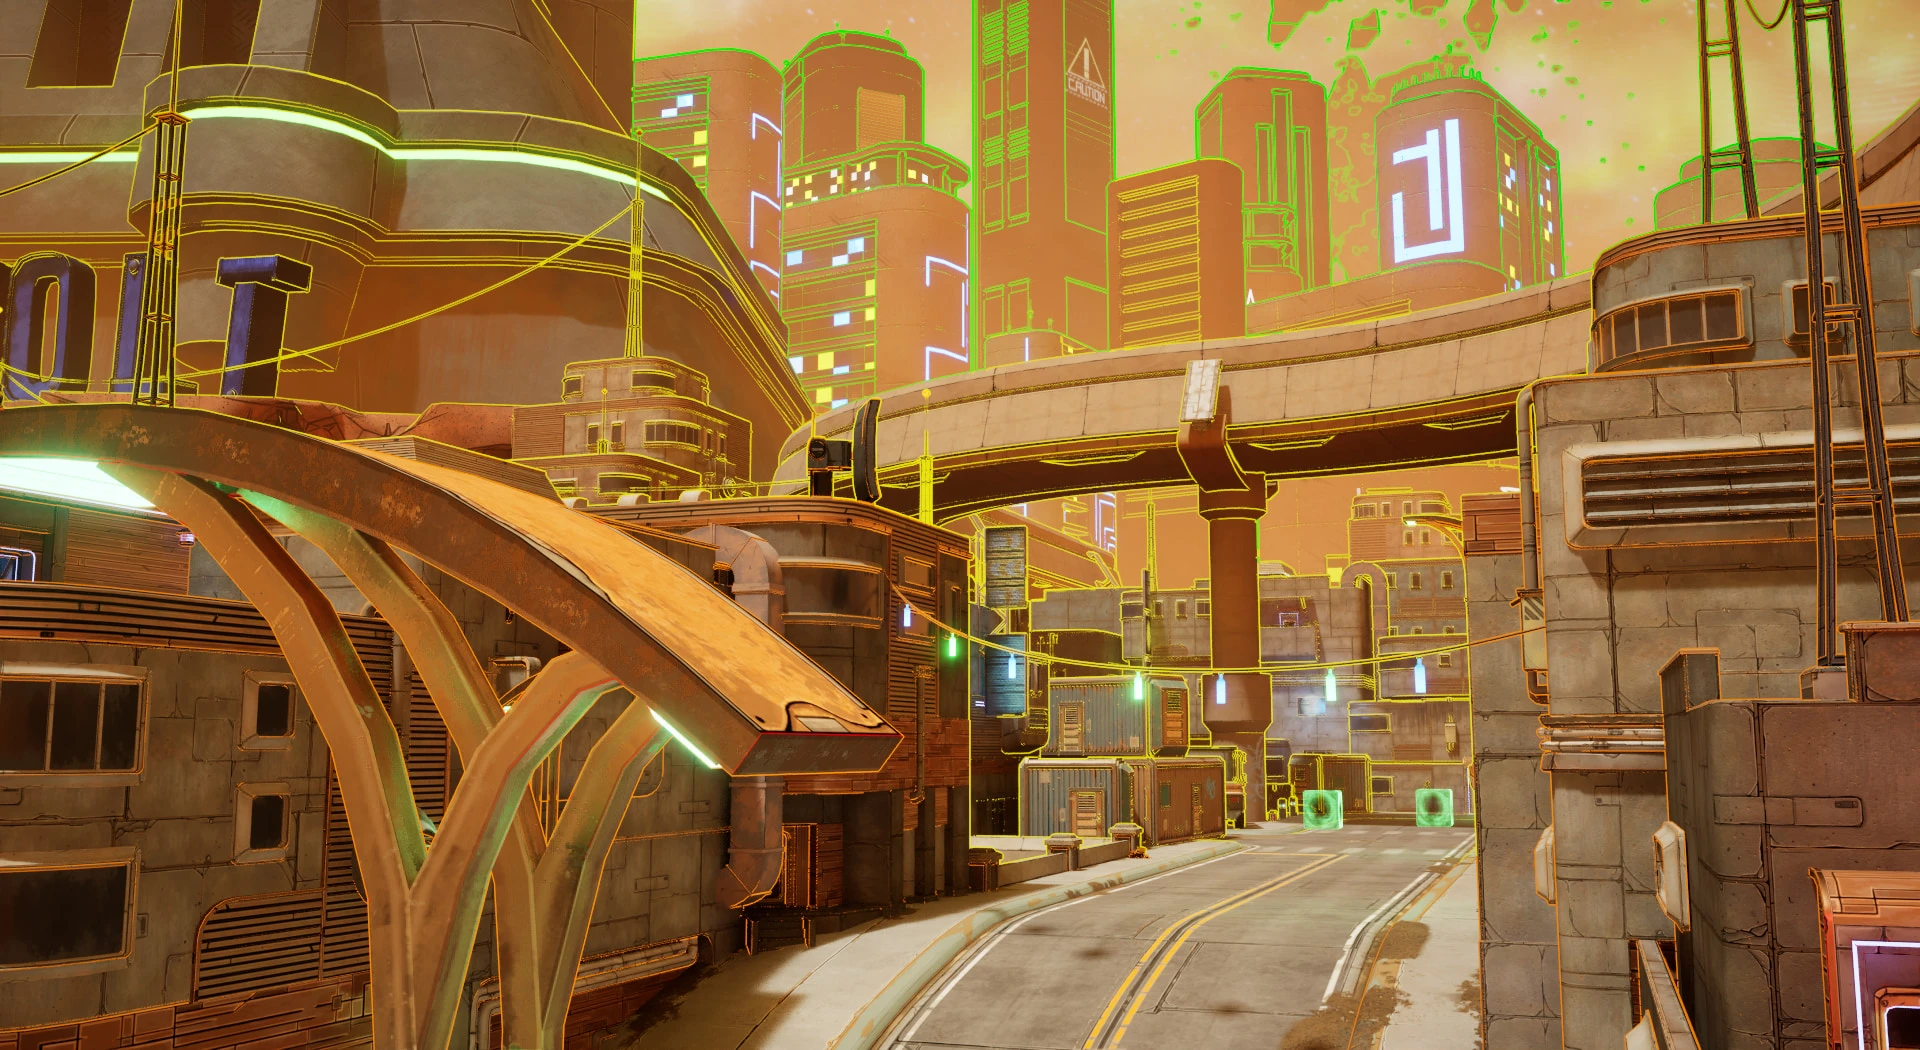
The outline parameters
- float
- bool
- vector
Debug
Layer Red
- Depth
- Normal
- Band
Layer Orange
- Depth
- Normal
- Band
Layer Yellow
- Depth
- Normal
- Band
Layer Green
- Depth
- Normal
- Band
Masking actors out
Some actors are left out of the outline. A hard black edge around a hologram or a cloud of particles doesn’t fit Borderlands’ style, and on very busy meshes like grass the lines turn into noise. The outline samples Custom Depth as a mask, so turning on Render CustomDepth for an actor takes it out of the outline. In the project, that’s the grass, the BANG billboard, the vehicle and both characters.
Lighting
I didn’t place the main lights, but I made a lot of the secondary lighting, like the holograms and emissives. I also helped fix lighting performance problems by setting lights to static and marking large meshes as static.
I set up the sky with Ultra Dynamic Sky and tuned it to the look. Fog cards break up the colours down the streets, and local volumetric fog volumes pick out areas like the sewers.
I also wrote the Lighting slide of the art bible, which set the time of day and the colour scheme.
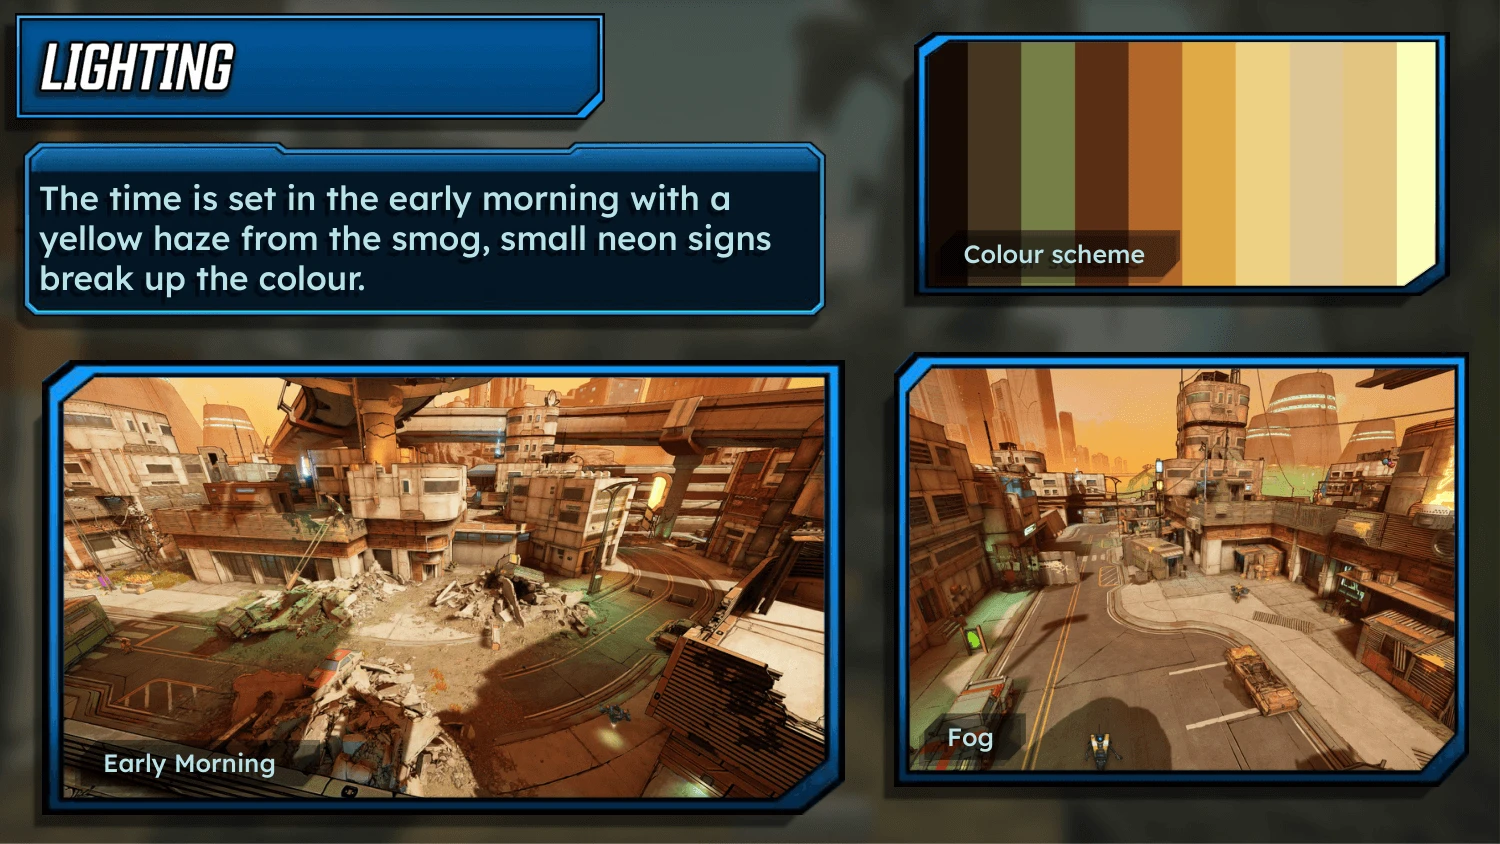
VFX
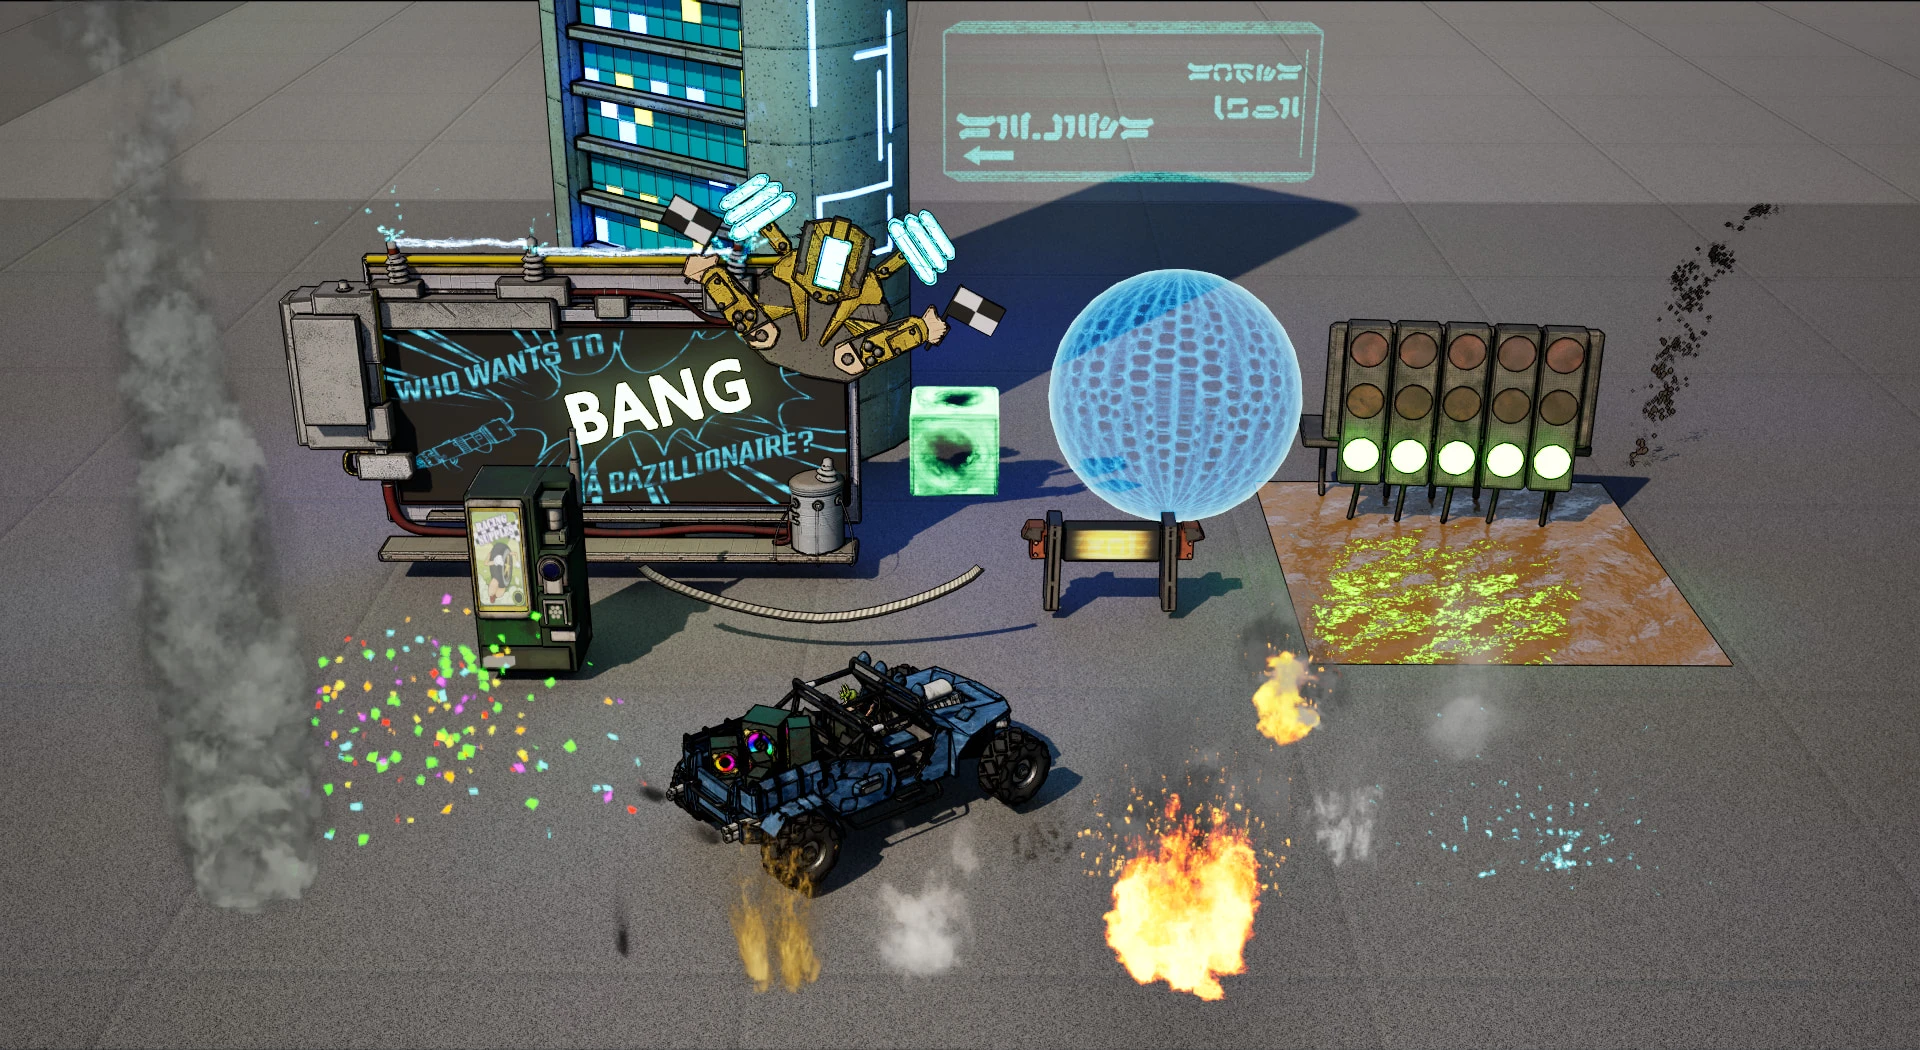
I made every VFX in the project, and wrote the two VFX slides in the art bible that set the rules for them.
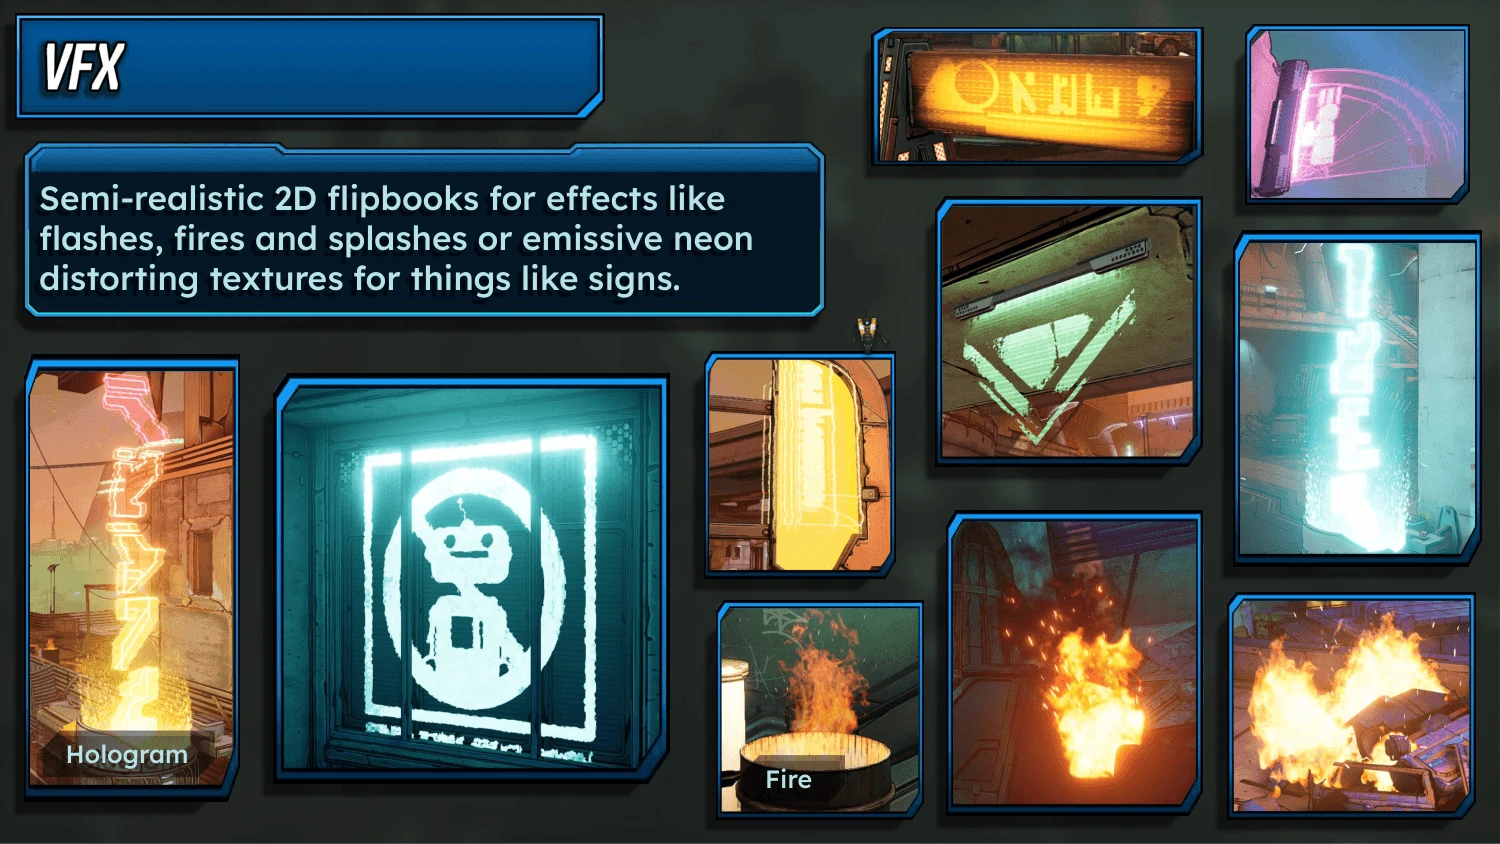
Some are simple material effects with a bit of motion, like the start lights and the asteroid belt in the sky. The rest are Niagara systems, mostly fire and smoke, which share one small set of flipbooks and material instances instead of each system carrying its own.
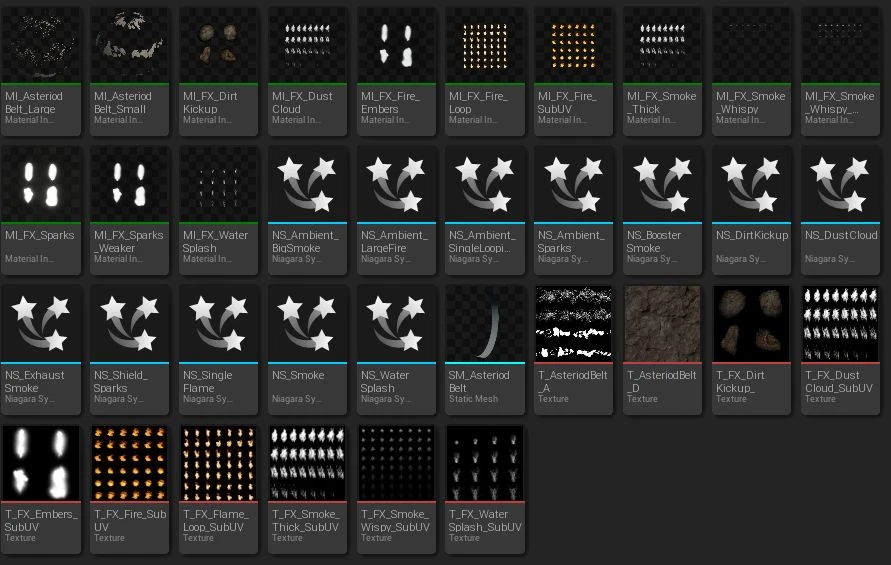
Most of the VFX went in over the last few weeks, once there was a playable build and a real scene to put them in: fires and smoke around the level, exhaust and tyre dust on the cars, and the item effects. Because they share assets and are heavily parameterised, I could get a lot of effects out of very little.
Reflections
The VFX went in late because other parts of the project were more pressing, and I had to work late to get them all in. I’d have liked more time on them. Custom depth was also an expesnive way to mask, I could have used hiding the mask in specular since most meshes did not use it.
Sources
Allcock, C. and Kester, S. (2019). The Art of Borderlands 3. [online] Titan Books. Available at: https://www.waterstones.com/book/the-art-of-borderlands-3/chris-allcock/scott-kester/9781789090819.
A general reference for the game's art direction.
Full Sail University (2020). Art Creation Pipelines for Huge Games Like Borderlands 3. [online] YouTube. Available at: https://www.youtube.com/watch?v=NNTGcSnEnig.
A developer talk on the move from hand-painted textures to a more procedural painterly approach.
Gearbox Software (2020). Borderlands 3 on Steam. [online] store.steampowered.com. Available at: https://store.steampowered.com/app/397540/Borderlands_3/.
The reference for the game.
Gnomon (2019). The Art of Borderlands 3 with Gearbox Software. [online] YouTube. Available at: https://www.youtube.com/watch?v=_xKg-U58tFE.
General inspiration for the art of Borderlands.
IGN (2017). Borderlands 3 Unreal Engine 4 Tech Demo - GDC 2017. [online] YouTube. Available at: https://www.youtube.com/watch?v=-cw2gXq83n8.
An early tech demo explaining the outline effect, before the game's release.
Unreal Engine (2018). Post Processing in UE4: Cel-Shading | Live Training | Unreal Engine Livestream. [online] YouTube. Available at: https://www.youtube.com/watch?v=cQw1CL0xYBE.
The livestream the outline's edge detection is based on.